Arduino to Raspberry Pi Serial Communication
In this tutorial you learn how to send data from an Arduino to a Raspberry Pi.
For the communication we use an USB cable. It could be the USB cable that you use to connect the Arduino to your PC or Laptop.
But in this tutorial you connect the Raspberry Pi instead of the PC or Laptop.
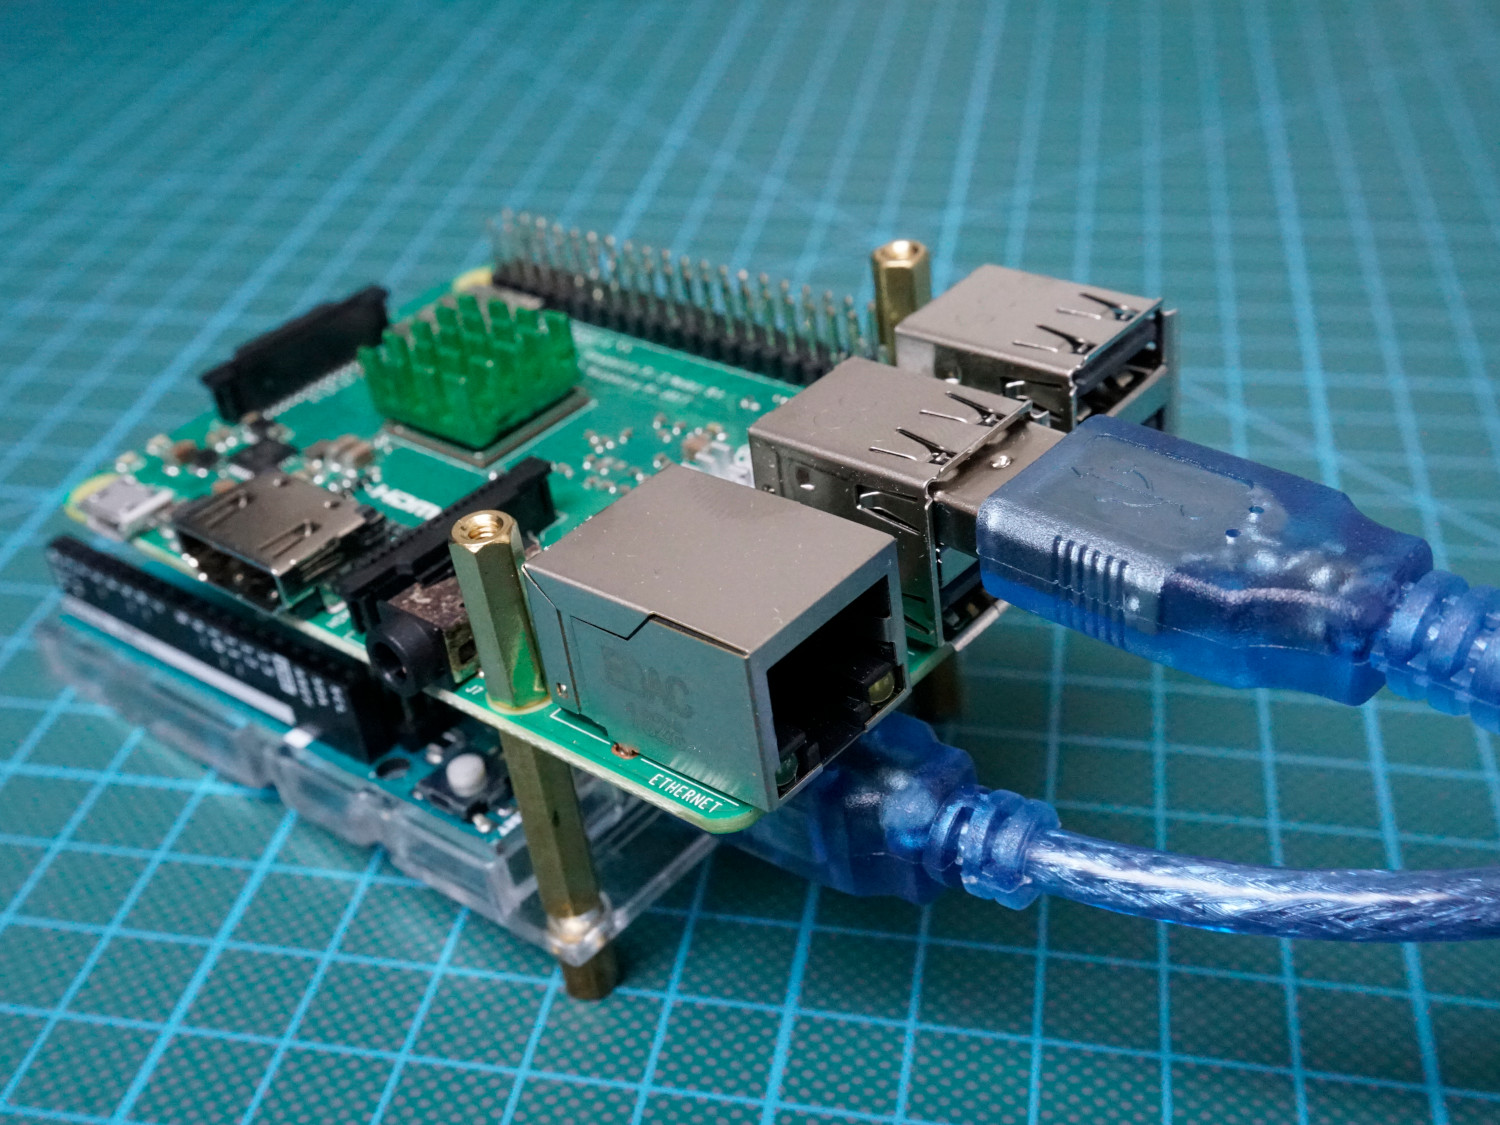
Table of Contents
The wired connection is great to get a first impression how two different systems like the Arduino as micro-controller and the Raspberry Pi as single board computer (SBC) are able to work together. If you are also interested in the differences between the Arduino and Raspberry Pi, than take a look at this article where you find a great overview.
Nevertheless the wired connection is not at work in my daily IoT live, because I use the Arduino or ESP8266 based micro-controllers as satellites in my home where in the center is the Raspberry Pi in a server rack. Because I do not have USB cables in my walls of course I use a WiFi connection. If you also prefer a wireless connection than you find here the tutorial.
Connection between Arduino and Raspberry Pi
As mentioned before we use an USB cable for the Arduino to Raspberry Pi communication. Now let us talk about the power supply for the Raspberry Pi and the Arduino. The power supply for the Pi is not restricted by the serial communication. We can power the Raspberry Pi as usual about the micro USB port on the side of the unit. But in case of the Arduino the USB cable connection is blocked by the connection to the Raspberry Pi. So what should we do?
In general we have to differ between two use cases.
- The Raspberry Pi is connected via USB to a PC or Laptop.
In this case you have to find another power supply for the Arduino because the PC or Laptop is not able to supply both the Raspberry Pi (~ 700mA/5volt) and the Arduino (~ 40-50mA/5volt). Also this was my first idea and I tried this possibility, but the power supply of the Raspberry Pi broke down and the Pi shut down. Good to know that there are two other possibilities to save the power supply as you can read in the different article about the micro-controller: Arduino Mega, Arduino Uno, Arduino Nano.
In case of you used Arduino Uno we use the DC barrel power jack. - If the Raspberry Pi is connected via USB directly to the socket
than you can use the power supply via the USB connection to the Raspberry Pi to power both the Pi and the Arduino.
The following table gives you an overview of all components and parts that I used for this tutorial. I get commissions for purchases made through links in this table.
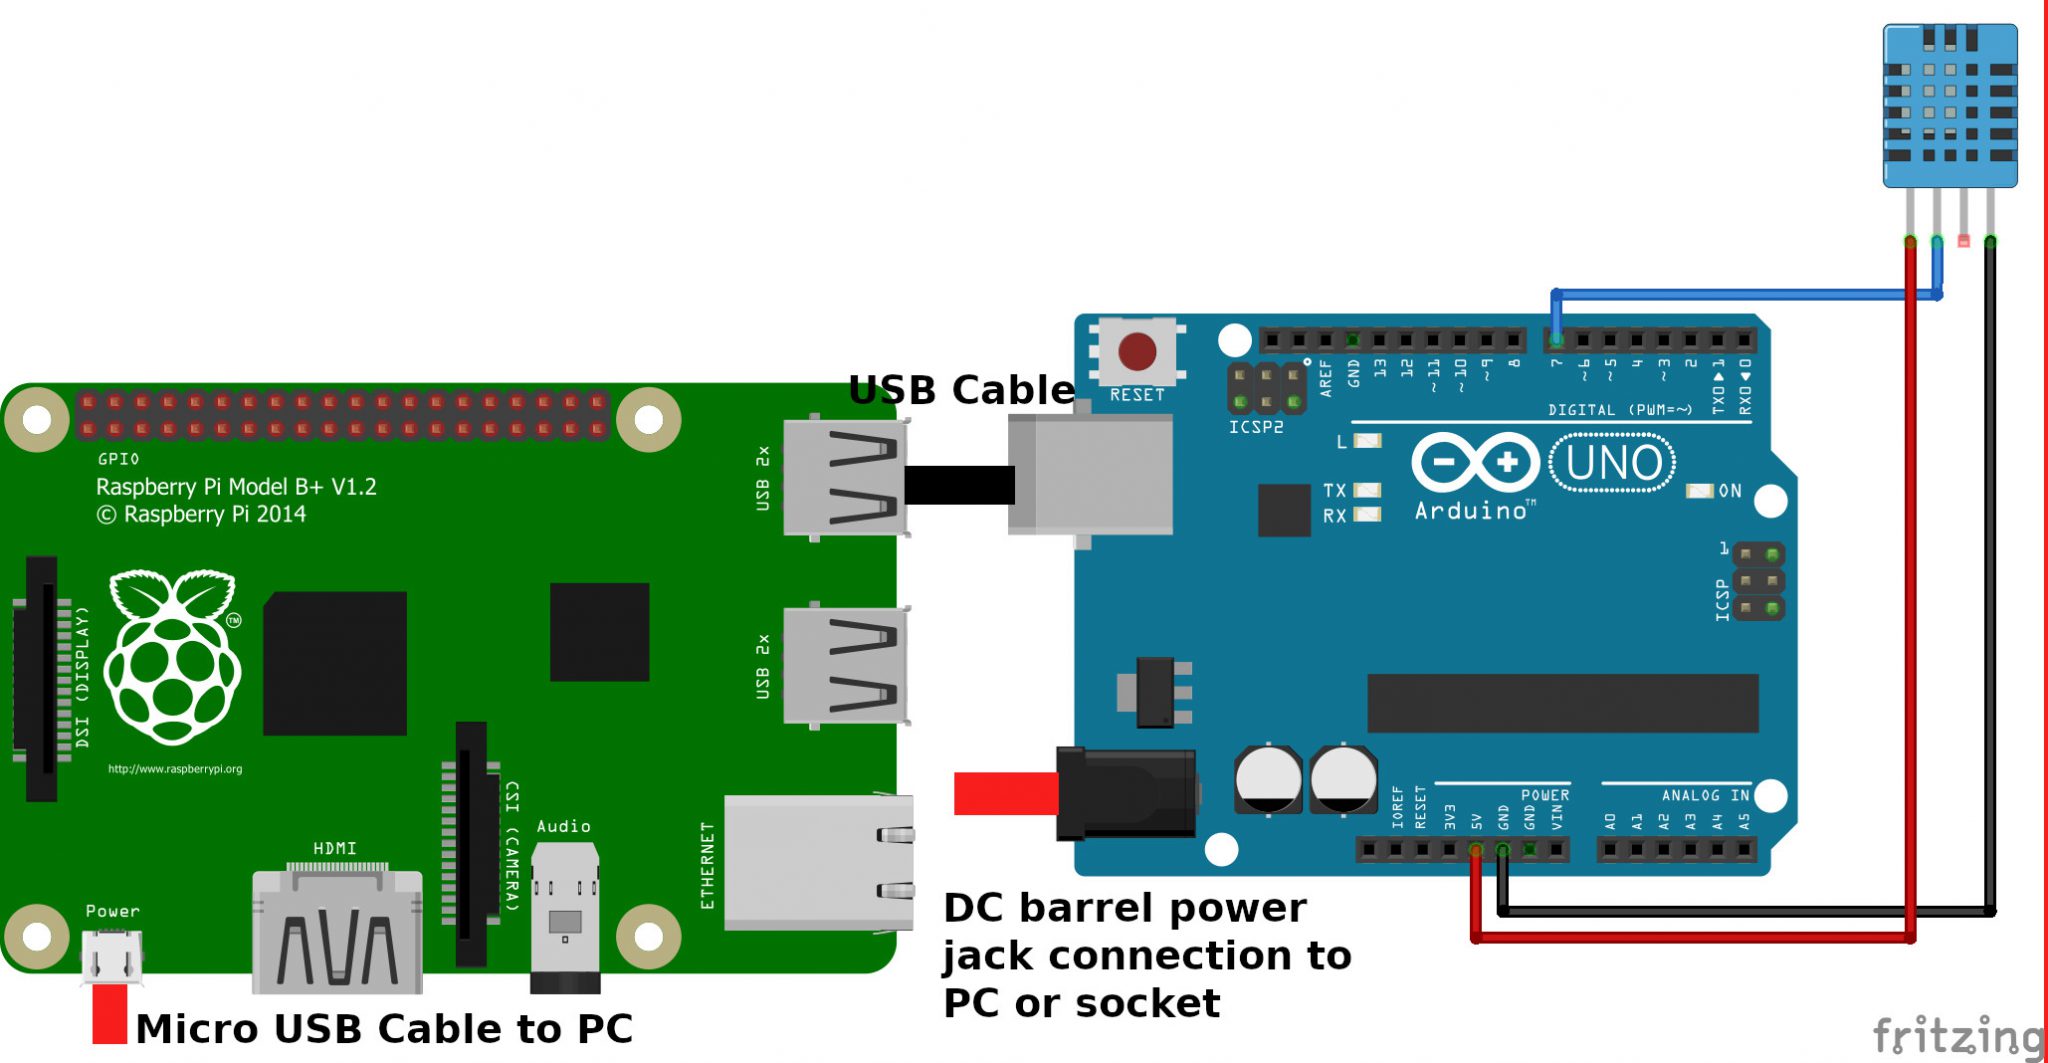
In the following two pictures you see the connection if you want to connected the Raspberry Pi to the Laptop or PC or if you connect the Raspberry Pi to a socket.
Arduino to Raspberry Pi serial communication setup if Raspberry Pi is connected via USB to PC or Laptop
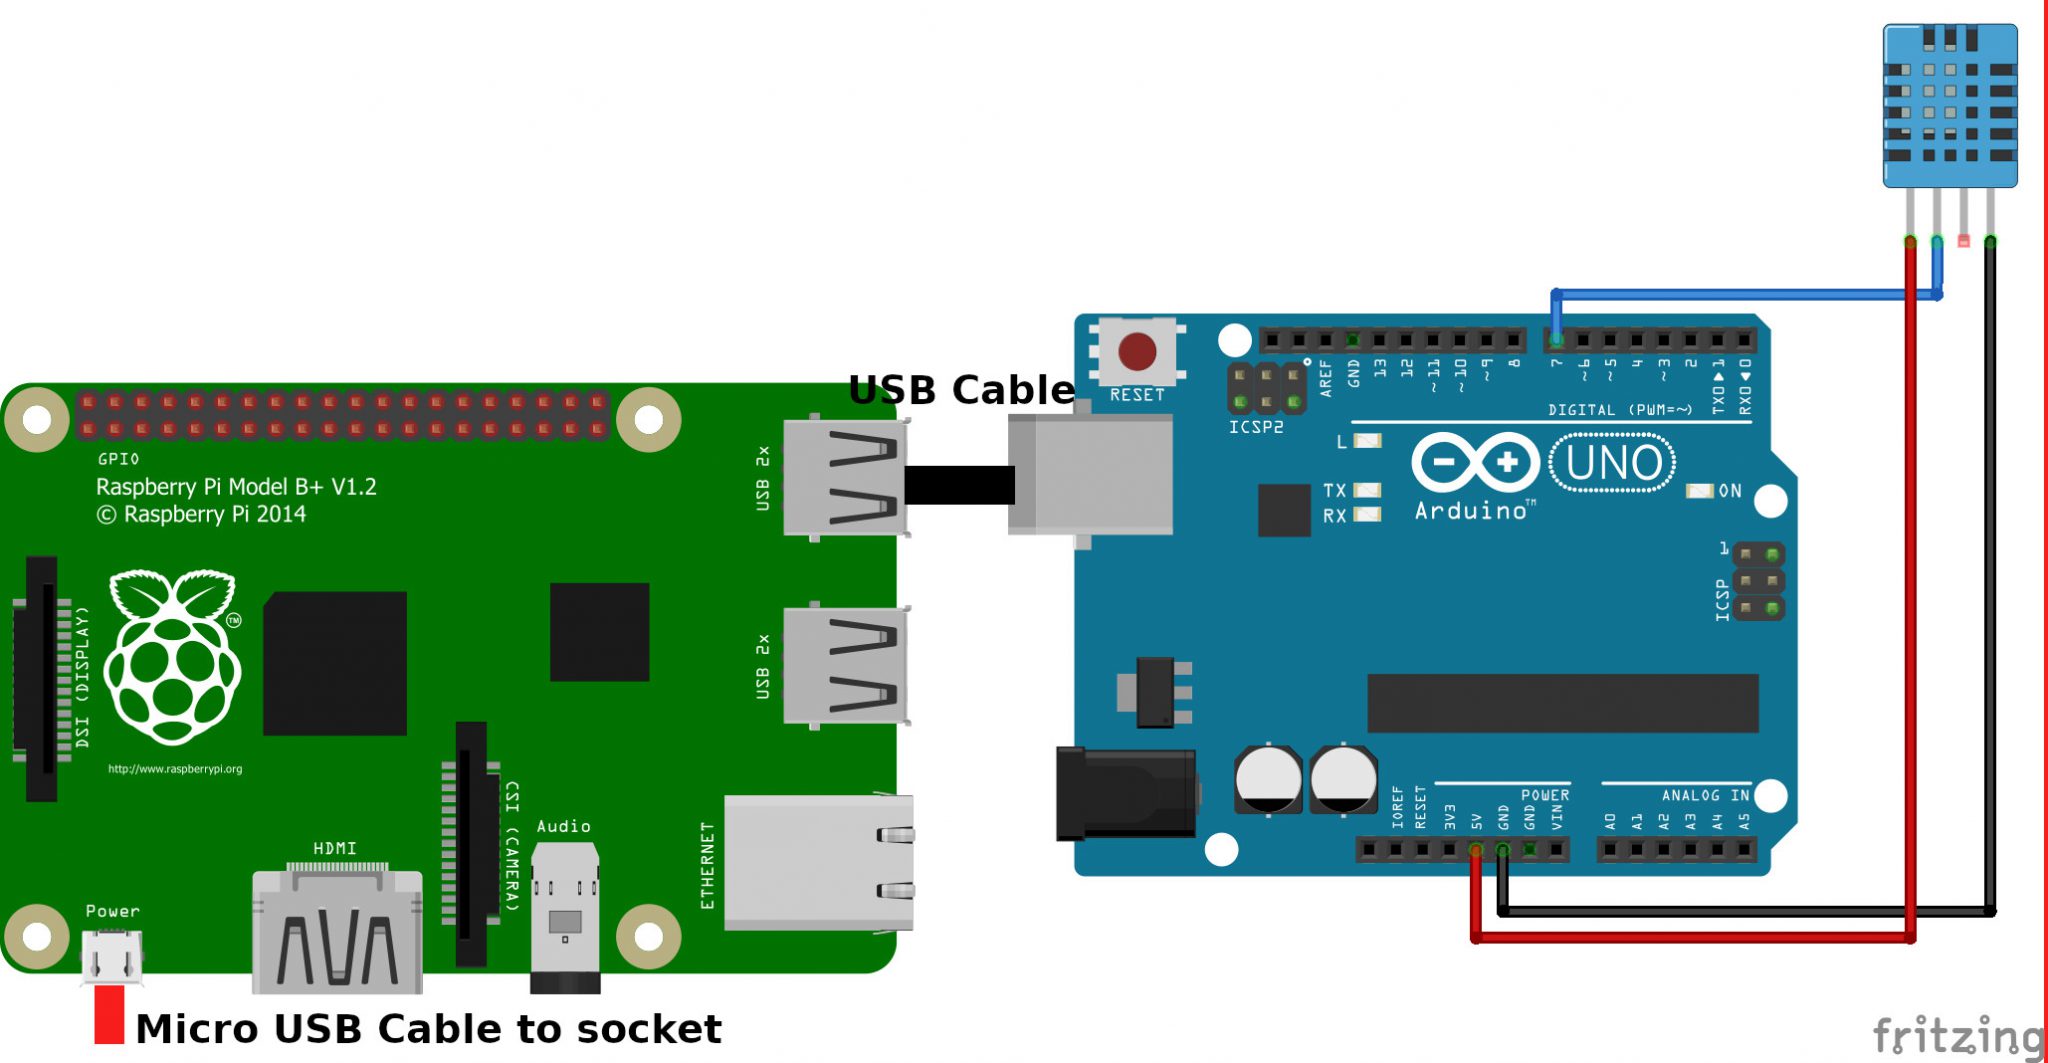
Arduino to Raspberry Pi serial communication setup if Raspberry Pi is connected via USB to socket
Now we want to make a short example for the Arduino to Raspberry Pi serial communication. We want to send the temperature and humidity of a DHT11 sensor from the Arduino Uno to the Raspberry Pi via the USB connection. The Raspberry Pi should print the temperature and humidity to the terminal.
Arduino Setup
We want to start with the Arduino setup. First we have to connect the DHT11 sensor to digital Pin 7 of the Arduino Uno as well as power and ground.
The script is pretty easy. If you want to know more about temperature sensors, I wrote a whole article which gives you detail information about the different sensors.
#include "DHT.h"
#define DHT11PIN 7 // define the digital I/O pin
#define DHT11TYPE DHT11 // DHT 11
DHT dht11(DHT11PIN, DHT11TYPE);
void setup() {
Serial.begin(9600);
dht11.begin();
}
void loop() {
float h11 = dht11.readHumidity();
float t11 = dht11.readTemperature();
Serial.print("Temperature = ");
Serial.print(t11 + 273.15);
Serial.println(" Kelvin");
Serial.print("Humidity = ");
Serial.print(h11);
Serial.println(" %");
delay(1000);
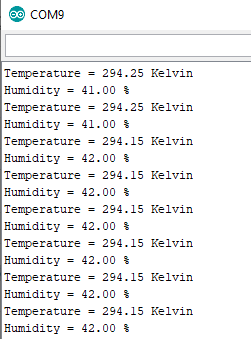
} It is important that the message we want to send to the Raspberry Pi is printed to the serial because if is printed to the serial, than it is also send via USB. The serial monitor of the Arduino IDE shows the output. Everything is looking good.
In the next part we setup the Raspberry Pi to receive the temperature and humanity from the Arduino.
Raspberry Pi Setup
My Raspberry Pi is in a standard setup with the OS Raspbian Buster. If you want know how to setup the Pi very quickly and without any monitor, mouse or keyboard, than check out my step by step tutorial for the Raspberry Pi headless setup.
Now everything is prepared and we can get into the programming part of the Raspberry Pi. Because we want to create the code with python and also want to display the code with the help of a python script we have to install two libraries. Execute the two following commands in the terminal:
- sudo apt-get install python-serial
- sudo pip install pyserial
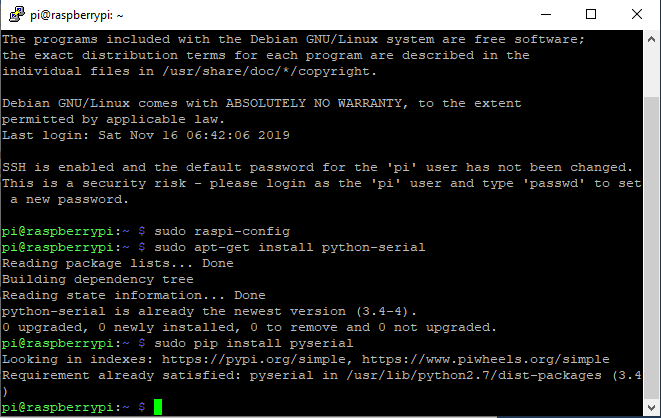
In my case python-serial and pyserial was already installed. Because I do not know how your Raspberry is setup please do not skip this step and make sure that your script will run.
Because there are different USB ports on the Raspberry Pi we have to find out what serial address the Arduino is connected. From now on please connect the Arduino via USB to the Raspberry Pi.
The serial address is stored in the following folder /dev. USB Serial port adapter are named as ttyUSB0, ttyUSB1 and so on or ttyACM0, ttyACM1 and so on. Therefore we have to look out for such a serial connection.
Enter the folder by typing ls /dev/tty* in the terminal.
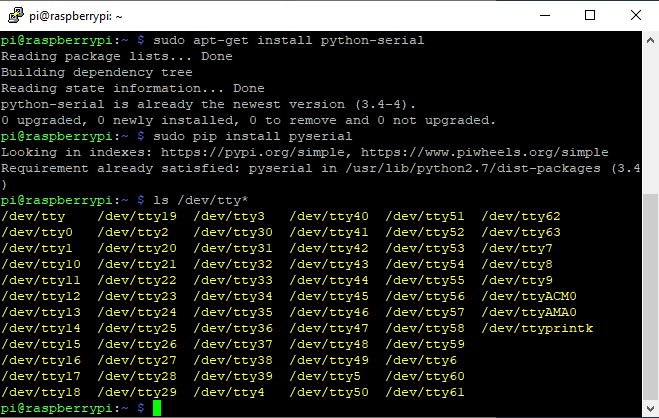
In my case I found the serial connection with the name /dev/ttyACM0. Copy or write down your name for the serial connection, because we use the name in the following program code.
Now we want to create the program code. Because the code is very short we create the python file directly on the Raspberry Pi. Create the file with nano arduino_communication.py.
Now the nano text editor opens an empty python file called arduino_communication. The script is the following:
import serial
ser = serial.Serial('/dev/ttyACM0',9600)
while True:
	read_serial=ser.readline()
print(read_serial) 
First we import the serial library. In the second line we save connection from the serial port in the variable ser. Here you have to insert your serial address along with the baud rate. In my case the serial address is
/dev/ttyACM0 and the baud rate is 9600 from the Arduino sketch.
Then we enter an endless loop and read out the data from the serial port and print the data to the terminal.
Click Ctrl + X, then Y to confirm to save and hit the enter button to save to the existing file.
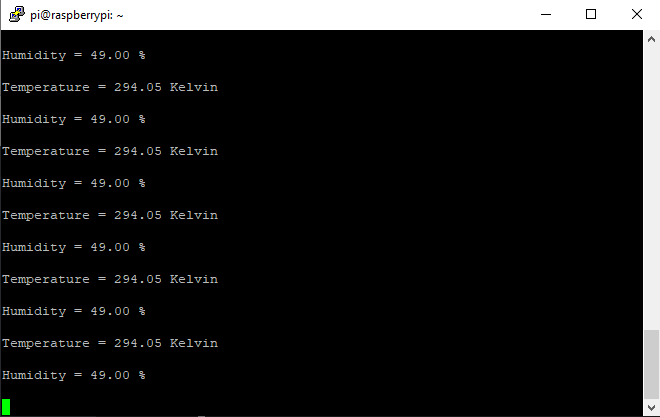
Start the python script from the terminal with python arduino_communication.py. Now you should see the temperature and humidity from the DHT11 transferred via the Arduino and serial USB communication.
You can terminate the script by clicking Ctrl + C.
Conclusion
In this tutorial we learned how to use an Arduino to Raspberry Pi serial USB communication to send data from the Arduino to the Raspberry Pi. Also there is the possibility to send data via WiFi and the transportation protocol MQTT. If you are interested in the wireless connection to send data, you find here the article.
If you have any problems for the serial connection or questions regarding this tutorial, feel free to use the comment section below to ask your questions.
Leave A Comment