Raspberry Pi Headless Setup Tutorial
In this tutorial you learn how to do a Raspberry Pi headless setup without a monitor, mouse or keyboard.
In total there are 3 steps we have to make for the Raspberry Pi headless setup.
- Download and Install the Raspberry Pi OS (former Raspbian)
- Enable SSH and WiFi for Remote Access
- Connect to Raspberry Pi via SSH and set static IP configuration.
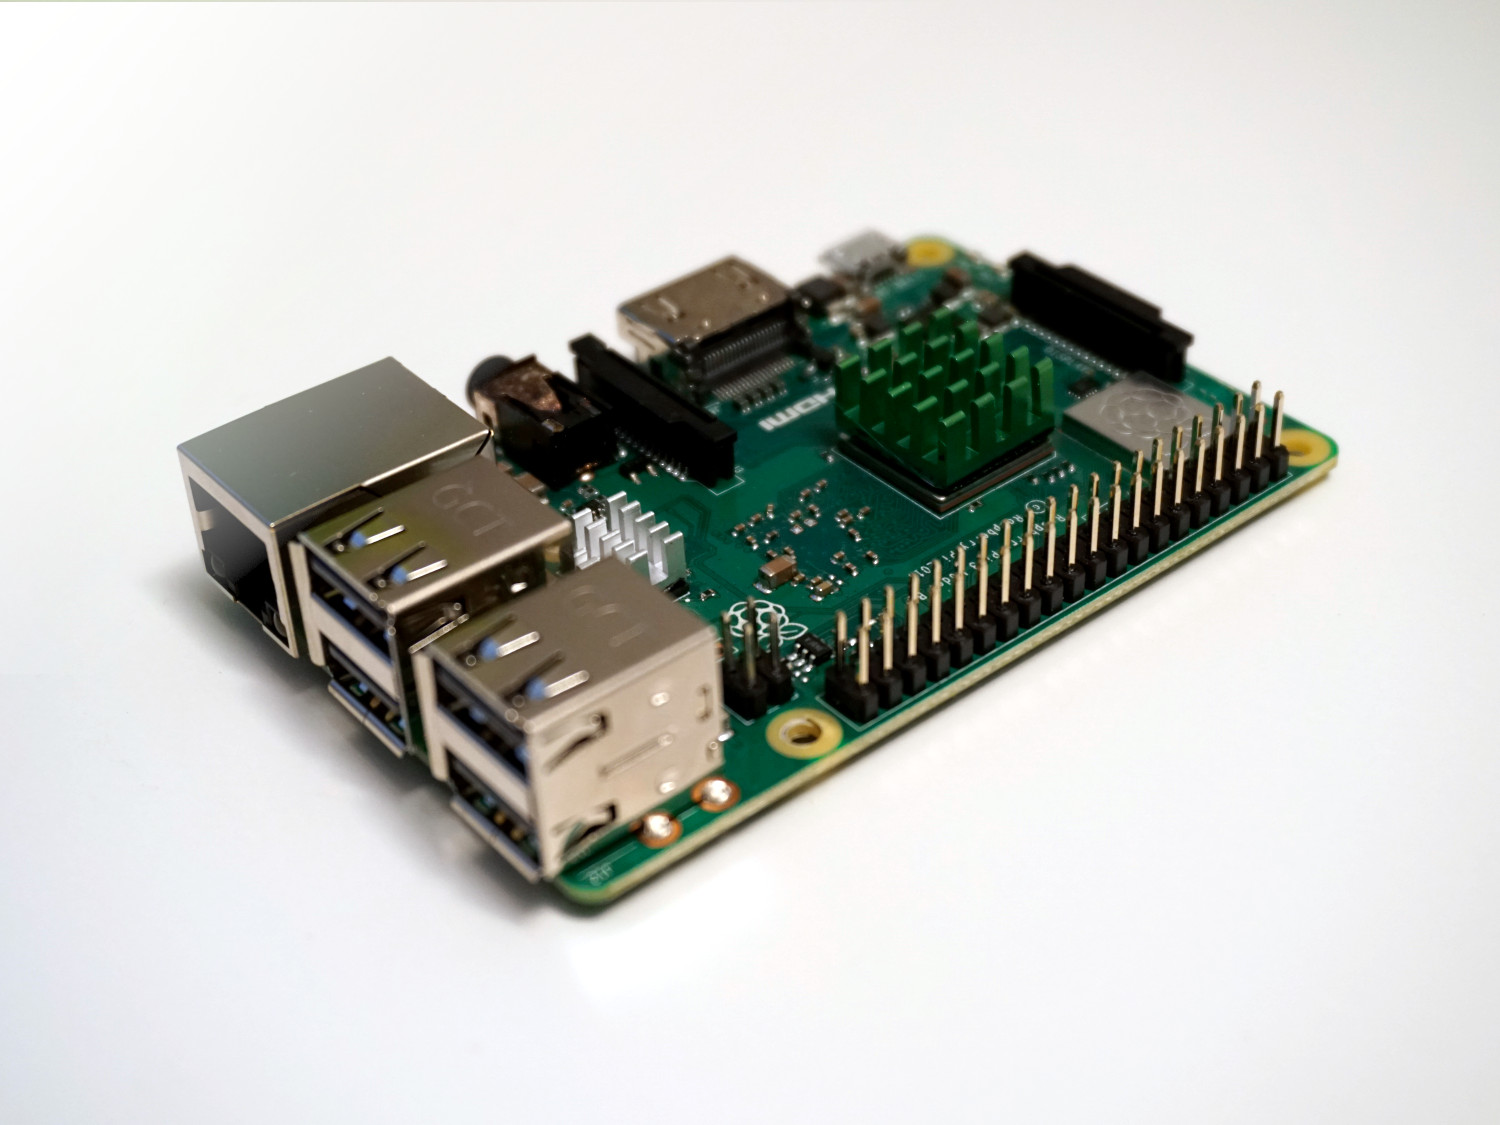
Table of Contents
Because we do not need anything but the Pi itself, it is called a headless setup. This makes the setup really fast and you do not have to switch mouse and keyboard between Raspberry Pi and your PC.
In total it will take around 20 minutes including all downloads and settings.
The following table gives you an overview of all components and parts that I used for this tutorial. I get commissions for purchases made through links in this table.
Download and Install the Raspberry Pi OS
Download 5 minutes, install 5 minutes
The first step is to download the official or recommended operating system for Raspberry Pi, Raspberry Pi OS, former Raspbian Buster. You can download the software was torrent or zip file from the official website.
There are in total 3 different versions of the operating system:
- Raspberry Pi OS (32-bit) with desktop and recommended software (~ 2550 MB)
The additional recommended software is for example LibreOffice, ClawsMail, Minecraft, Scratch, Sonic Pi, RealVNC, and a few other bits and bobs. If you want to use your Pi as a PC with a mouse, keyboard and monitor I would recommend to install this version of the OS. - Raspberry Pi OS (32-bit) with desktop (~ 1150 MB)
This is in my opinion the default version of the Raspbian OS. We get the desktop, the Chromium web browser, the VLC media player and the Thonny Python IDE, plus a few desktop utilities. Also we can install the software we need after the setup. But I do not like to have plenty of software under the hood that I do not need. Also I need the desktop interface because in my smart home usage I want to display some graphs by connecting the Raspberry Pi to my TV. - Raspberry Pi OS (32-bit) Lite (~ 450 MB)
The light version of the OS does not come with a desktop graphical interface. In some cases and if you are an advanced user you can use the light version. But keep in mind that you have to use SSH every time.
I would recommend to download
Raspberry Pi OS (32-bit) with desktop. After the download is complete we have to install the operating system on the SD card. There are several software programs to do this task but Etcher is most used. Etcher is a free and open-source software to write images like .iso or .img file to storage media like USB sticks or SD cards. Download Etcher from the official website.
After the installation open Etcher. You should see the following screen.
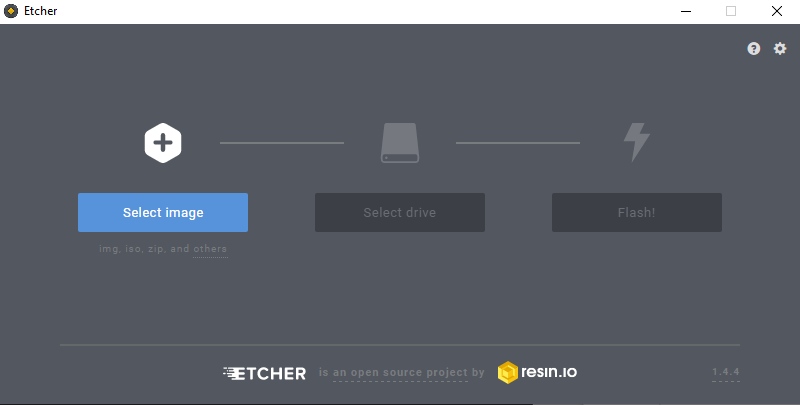
First we have to select the image. We select the Raspbian OS zip file that we downloaded some minutes ago.
The second step is to select the drive we want to install the image. Therefore we choose the SD card as driver.
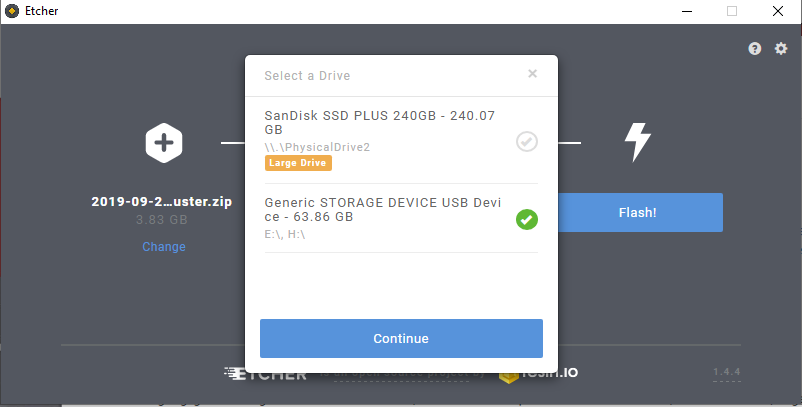
Now we can start the flashing which will take around 5 minutes. After the flashing and validation process is finished the SD card is ejected.
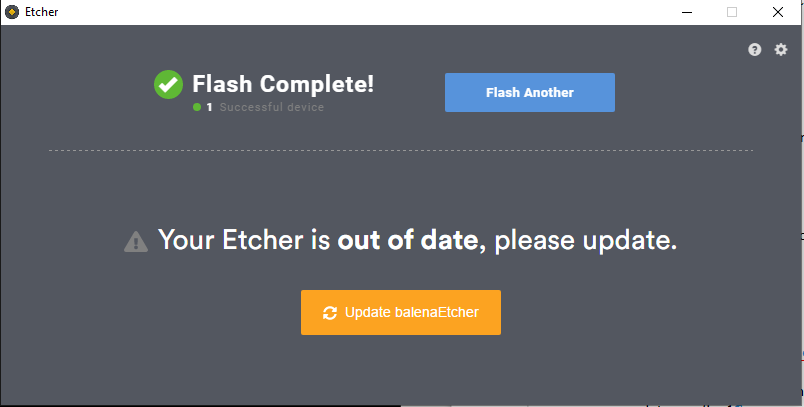
For a non headless setup you would insert the SD card in the Raspberry Pi and you are good to go. But for the headless setup we have to make sure that we can access the Raspberry Pi via the network remotely via SSH before starting the Raspberry Pi. In the next chapter the enabling of SSH is described.
Enable SSH and WiFi for Remote Access
5 Minutes
Because after the flashing the SD card was ejected we have to pull the SD card out and in again. Now start the command prompt. There are multiple ways to do:
- Use the search and type “command prompt”
- Press Windows + R to open the run window and type in “cmd”
Now after we started the command prompt we want to know under which character the SD card is listed to enter this drive. To list all disks we can use the command
wmic logicaldisk list brief
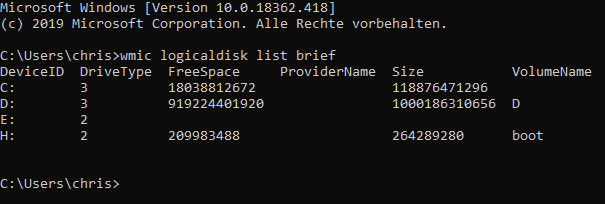
In my case I know that the SD card has the deviceID H.
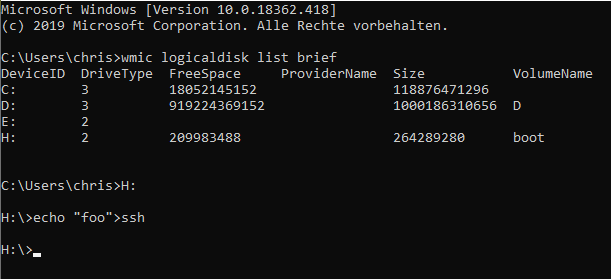
With the command “H:” I am able to access the SD card. Now we have to create a file called ssh. This will show the Raspberry Pi that we want to enable SSH for remote access. To create such a file type in the following command
echo “foo”>ssh
With the command “exit” we leave the command prompt.
The alternative and faster way is to create the ssh file is to access the SD card with your file explorer and create a text data called “ssh”, but make sure you delete the “.txt”.
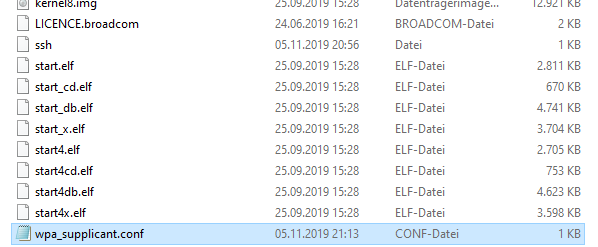
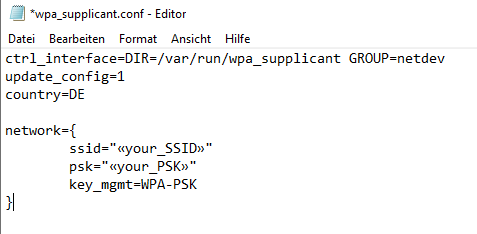
Now we are able to connect the Raspberry Pi via SSH. If you use a local LAN network you are ready to go to the next and final part of this tutorial. If you want to use the Raspberry Pi only with WiFi, we have to make sure that the Pi is able to connect via WiFi. Therefore we create an other file called “wpa_supplicant.conf”. Create a text data from your explorer and delete the “.txt” again. Now open the config file with your Editor and fill the file with the following text:
ctrl_interface=DIR=/var/run/wpa_supplicant GROUP=netdev
update_config=1
country=DE

network={
	ssid="«your_SSID»"
	psk="«your_PSK»"
	key_mgmt=WPA-PSK
Because I live in Germany I have to use DE for the country. If you live in the USA you use US. The key is related to the ISO3166-1 Alpha-2 code.
Also you have to add your SSID and password into that file and the WiFi encryption:
- Wired Equivalent Privacy (WEP)
- Wi-Fi Protected Access (WPA)
- WPA-PSK
- WPA2-PSK
- Extensible Authentication Protocol (EAP)
- EAP-PSK.
After the ssh and wpa_supplicant.conf file is created we eject the SD card manually. Now we can insert the SD card in the Raspberry Pi, connect the Pi to the network or use the WiFi connection and power the Raspberry Pi up.
Connect to Raspberry Pi via SSH and set static IP configuration
5 Minutes
To access the Raspberry Pi via SSH we have to know the IP address of the Pi. Therefore we need an IP scanner software. A common used free software which I also use is Advanced IP Scanner which is a free, fast and powerful network scanner with a user-friendly interface. You can download the Advanced IP Scanner from the official website. After installing and starting the software you can scan your local network for active IP addresses.
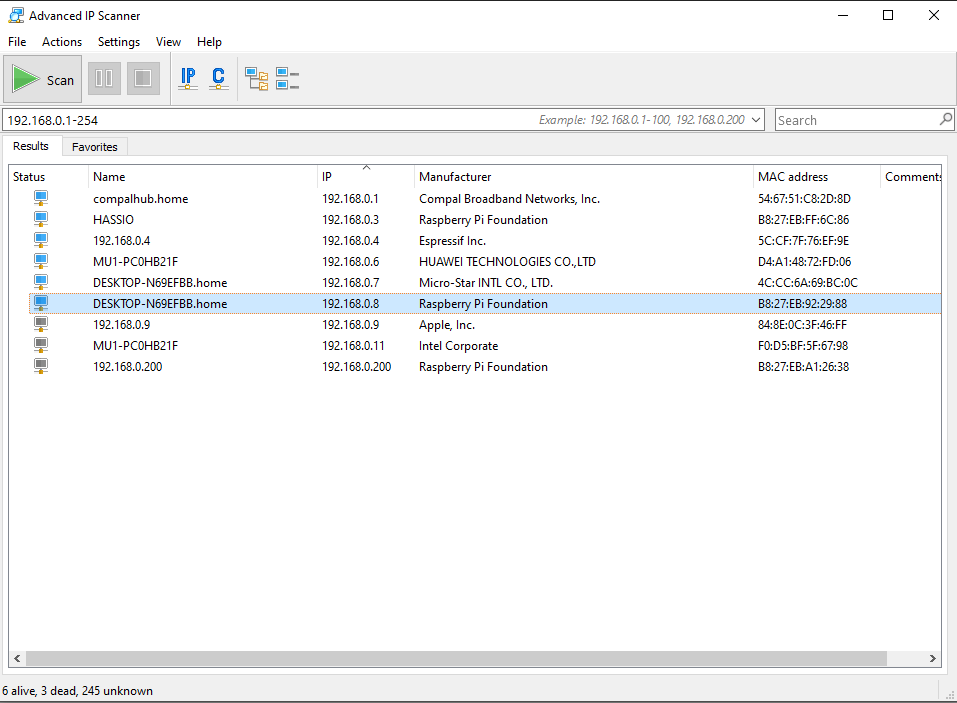
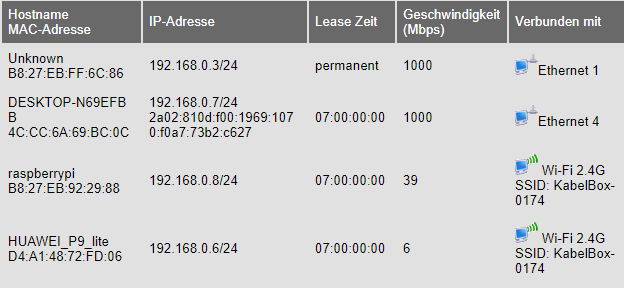
The alternative is to log in to your modem and look for connected devices. In my case the IP address is: 192.168.0.8
To access the Raspberry Pi via SSH we need a terminal emulator which supports the SSH network protocol. The most used program for this is Putty which you can download also from the official website. Putty is also free and open-source. After downloading and installing Putty, open the software. You should see a screen like the following.
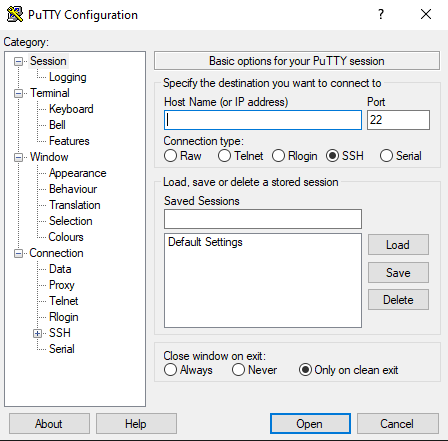
Type in the IP of the Raspberry Pi for the Host Name. The Port for the connection is 22. Select the connection type to SSH and click Open to establish the connection.
At the first connection you will get the following security alert that the servers host key is not cached in the registry.
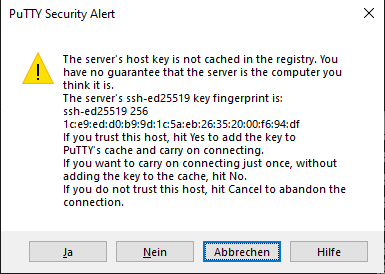
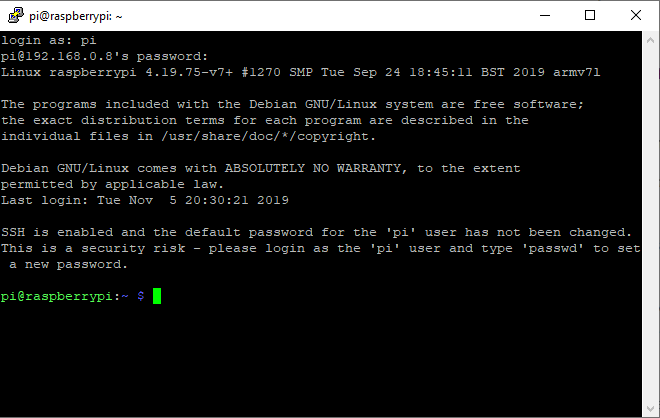
We confirm the connection with Yes. Now we have to provide the username and password. You use the following default settings:
- Username: pi
- Password: raspberry
Congratulation you are logged in over WiFi to your Raspberry Pi!
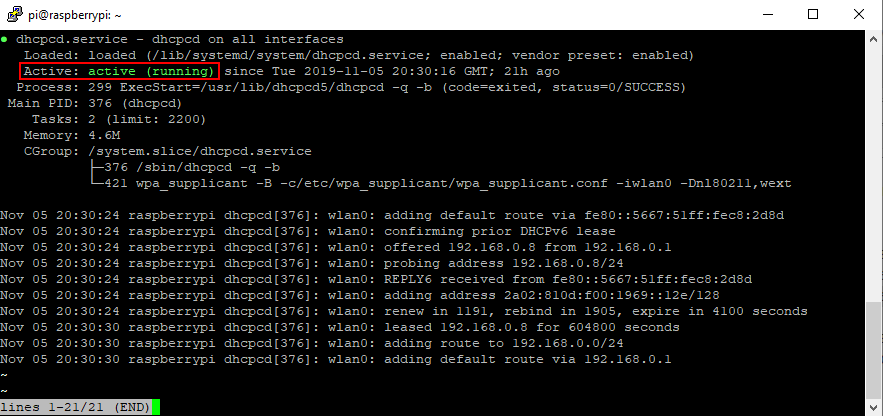
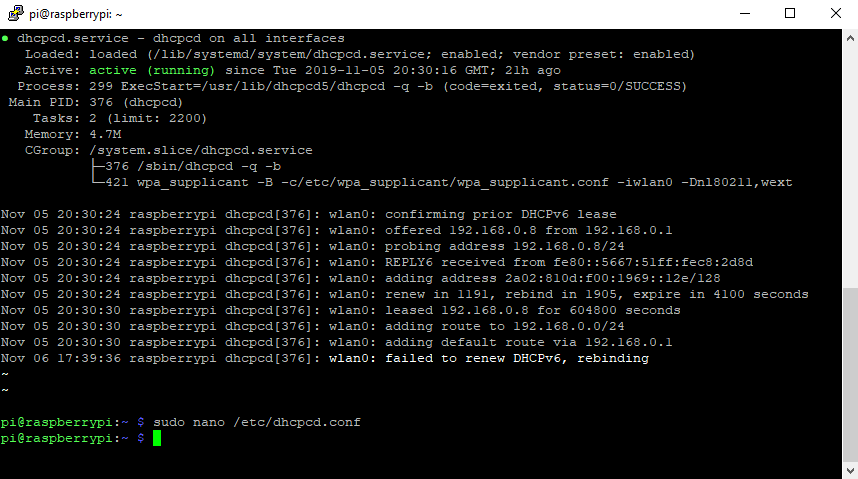
Because every time you restart the Raspberry Pi the modem will give the Pi another IP address, we change the IP address to a static IP. Therefore we need dhcpcd which operates as a daemon on a server to provide Dynamic Host Configuration Protocol service to a network. First we have to check if dhcpcd is active:
sudo service dhcpcd status
With the keyboad combination of Ctrl + C you get back to the main console. If dhcpcd is not active we start the dhcpcd service with the following two commands:
sudo service dhcpcd start
sudo systemctl enable dhcpcd
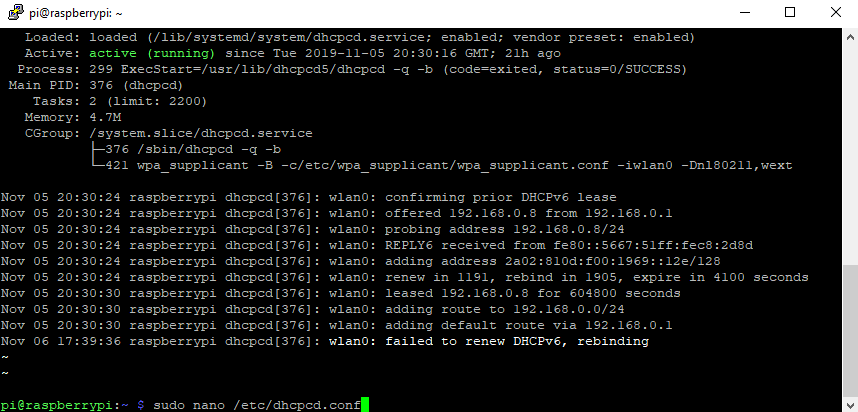
Now we have to provide the configuration for the dhcpcd. Therefore we create a config file with the preinstalled unix text editor nano:
sudo nano /etc/dhcpcd.conf
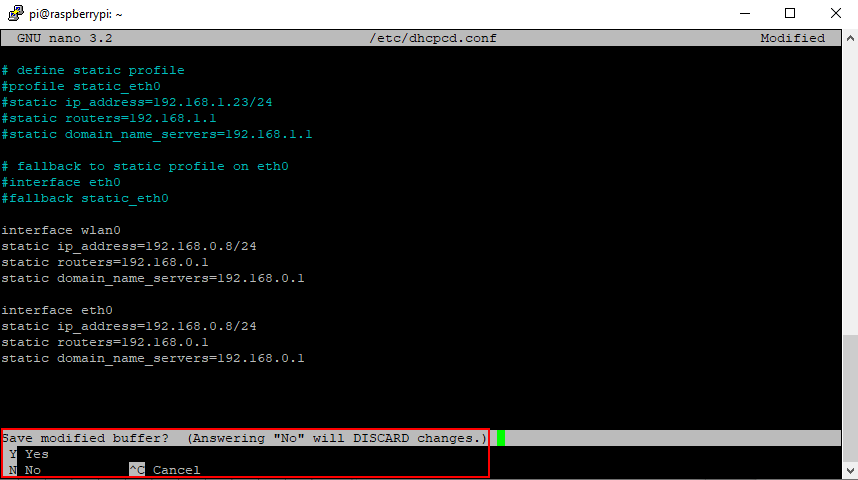
Now you are in the nano text editor. Navigate with the arrow down on you keyboad to the bottom of the text data. Copy the following lines and paste them with a click on your mouse right in your config data.
interface wlan0
static ip_address=192.168.0.8/24
static routers=192.168.0.1
static domain_name_servers=192.168.0.1

interface eth0
static ip_address=192.168.0.8/24
static routers=192.168.0.1
static domain_name_servers=192.168.0.1
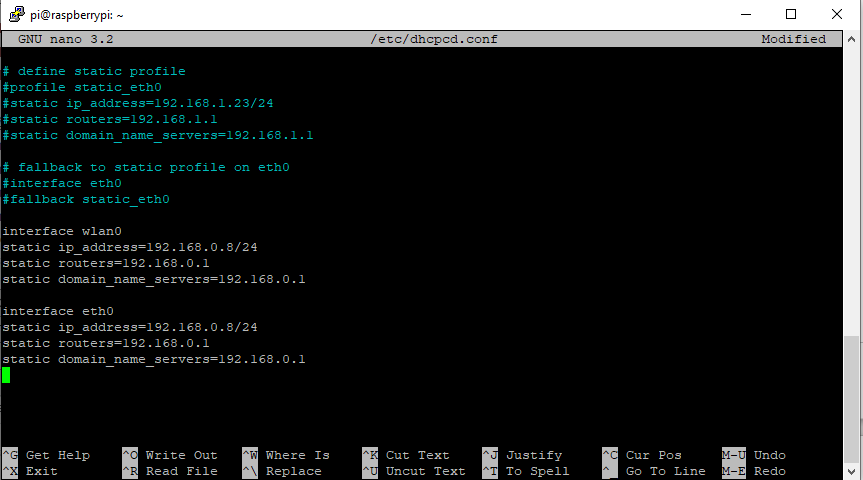
I will use the IP address 8 for the WiFi and Ethernet connection but you can choose a different IP address. Also if you changes the default domain server IP you have to change the IP of the domain server. The /24 after the IP address refers to how many bits are contained in the network.
As all IPv4 networks have 32 bits, and each “section” of the address denoted by the decimal points contains eight bits, “192.0.2.0/24” leaves eight bits to contain host addresses. This is enough space for 256 host addresses. You find more information on this website.
You save the nano text data while exiting the file. Click Ctrl + X, then Y to confirm to save and hit the enter button to save to the existing file. Now you are back to the main console and configured the static IP.
Update Raspberry Pi OS
To make sure that your Raspberry Pi is up to date use now the following two commands to update all packages on your Pi.
sudo apt-get update
sudo apt-get dist-upgrade
Now your Raspberry Pi is ready to go for you projects. If you want to shut down or reboot the Pi use the following commands.
sudo shutdown now
sudo reboot
Do you have any questions regarding the headless setup for the Raspberry Pi? Or do you have general questions about the Pi. Do not hesitate and use the comment section below to ask me your questions.
If you want to start a first project with your Raspberry Pi already setup, I want to recommend you the following two tutorials to build you own DIY smart home indoor weather station:
Cool stuff. I just found today some items that may be in your wheelhouse:
https://github.com/openfaas/faasd
https://www.youtube.com/watch?v=iMZZdAU0uPU
https://www.youtube.com/watch?v=r4mEF8rtXWo
Hi BostonTom,
to use the AWS, Azure and Google Cloud is on my project list 🙂
Does this work for rasp pi 2 as well?
I think this is one of the most vital info for me.
And i’m glad reading your article. But wanna remark on some general things,
The website style is perfect, the articles is really excellent : D.
Good job, cheers