Raspberry Pi Home Assistant Docker Setup
In this tutorial you learn how to install Home Assistant through Docker for your Raspberry Pi.
For a full smart home system you need some additionally applications alongside Home Assistant. Therefore this tutorial includes the following installations via Docker:
- Home Assistant as overall smart home dashboard to control your smart devices.
- Mosquitto as MQTT broker to receive data from self build sensors in your home.
- InfluxDB as database to store MQTT data.
- Grafana to create time series dashboards based on data in the InfluxDB database.
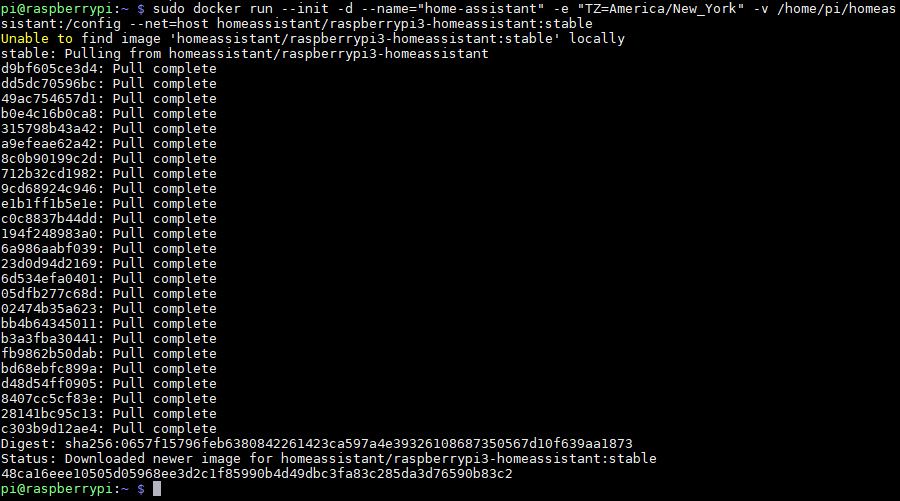
Table of Contents
This article belongs to a series of currently 5 articles about the topic Home Assistant. The following picture shows how the articles are related to each other.
The following table gives you an overview of all components and parts that I used for this tutorial. I get commissions for purchases made through links in this table.
In my opinion, the installation of Home Assistant via Docker on the Raspberry Pi is the more advanced way of using Home Assistant because this installation method allows you to run more applications or use cases on the same Pi.
Before we start with the setup let us look for the advantages and disadvantages of this installation method compared to the installation of Home Assistant via HASS.io.
In our case, we want to run Home Assistant on a Raspberry Pi in a Docker container. In this tutorial I assume that you already installed Raspbian Buster on your Pi. If you are not familiar with the initial setup of the Raspberry, then this tutorial of the headless Raspberry Pi setup is the right for you. I recommend to install Raspbian Buster Lite because we do not need the graphical user interface but only the command line. The following part of the tutorial expect that your have Raspbian installed, an internet connection and SSH activated.
Docker on the Raspberry Pi
In this article is not a docker guide because there are already very good articles about docker in general. But I will summarize the fundamentals of docker that you understand why we use it.
Docker is a set of platform as a service (PaaS) products that enables the isolation of applications through container virtualization. A container is an isolated image of software, libraries, configuration files and any other data to run the container application. Container can communicate with each other through predefined channels and also with the main operation system to load a predefined configuration for example. The main advantage of docker compared to virtual machines is that all containers are run by a single operating system kernel. This ensures that all resources are used at the best.
In our smart home use case, we use the Raspberry Pi as infrastructure of Docker with Raspbian Buster Light as host operating system. Between the operating system and the containers where the applications are running is Docker responsible for the creation, deletion and management of images and containers.
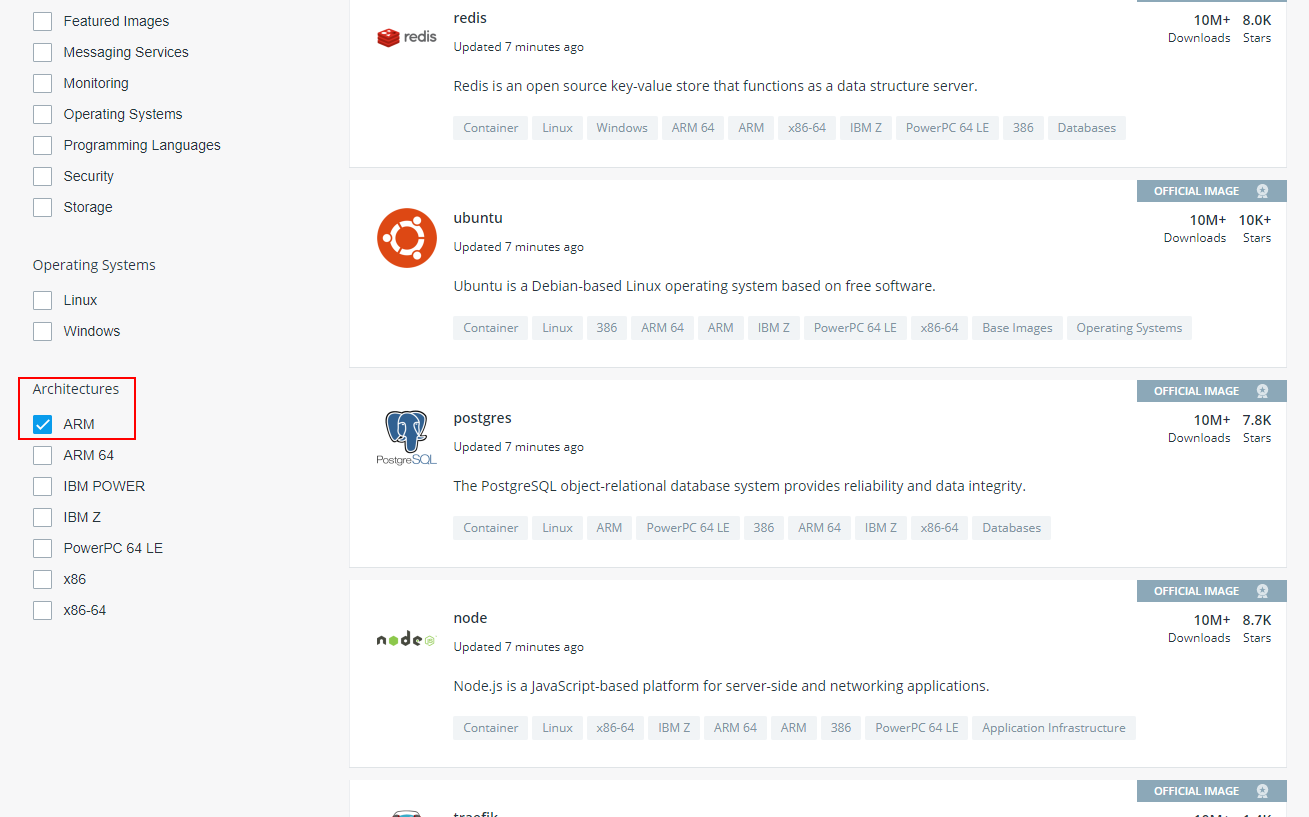
Because the Raspberry Pi is based on the ARM architecture, not all Docker images will work. You find all images on the Docker Hub website that allows the filtering of all images based on the architecture. For the Raspberry Pi we choose only the ARM architecture and not ARM 64 because Raspbian Buster is compiled as 32-bit operating system and not able to run 64-bit applications.
Before we can start downloading images and creating containers, we have to install Docker. Login on your Raspberry Pi via SSH or open the command line interface. The installation of Docker is done is two steps:
- Download the Docker installation script
- Execute installation script
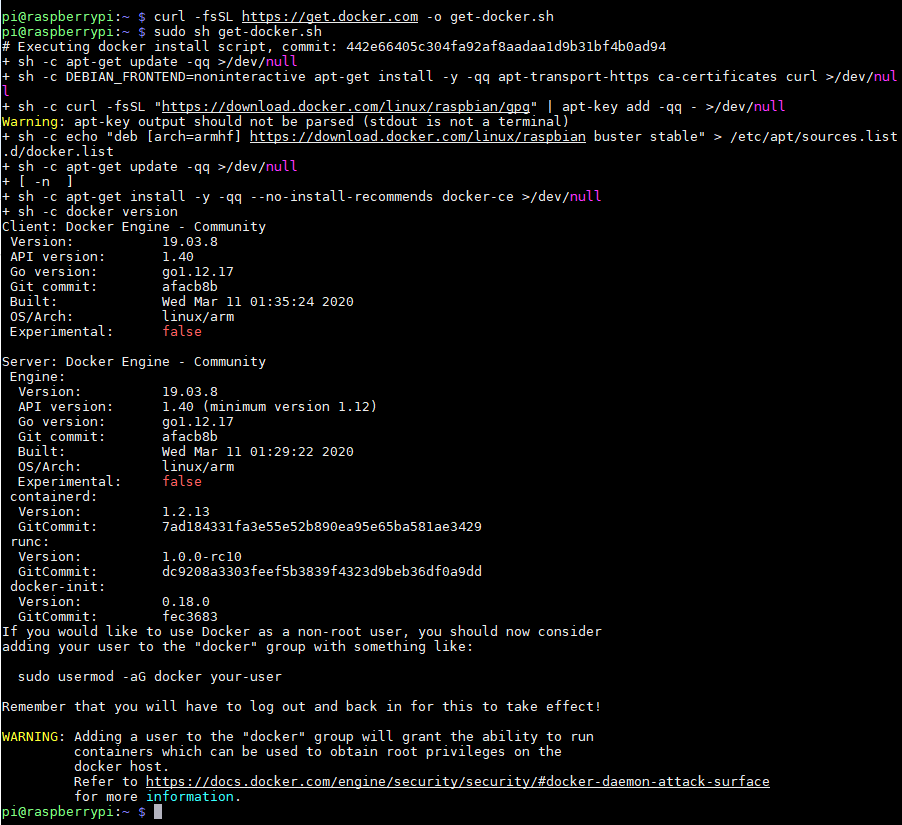
From the picture we see that Docker version 19.03.8 is installed. Now we have our foundation to install the applications:
- Home Assistant
- Mosquitto MQTT broker
- InfluxDB
- Grafana
Before we start you find the most used command line functions regarding Docker in the following table.
Install Home Assistant via Docker
From the official Home Assistant website we get the full installation command
docker run --init -d --name="home-assistant" -e "TZ=America/New_York" -v /home/pi/homeassistant:/config --net=host homeassistant/raspberrypi3-homeassistant:stable With the command you see that your Home Assistant Docker container is running with the container name home-assistant.
docker container ls -a 
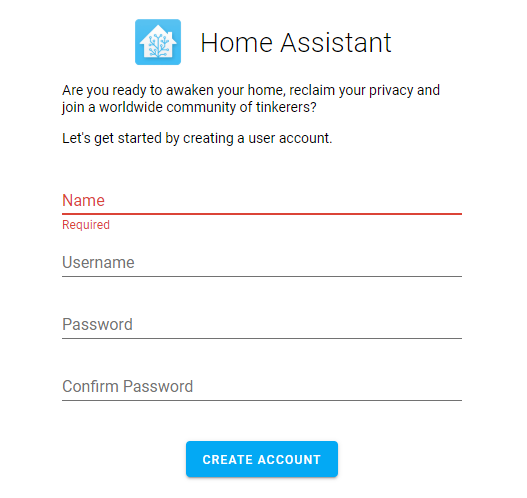
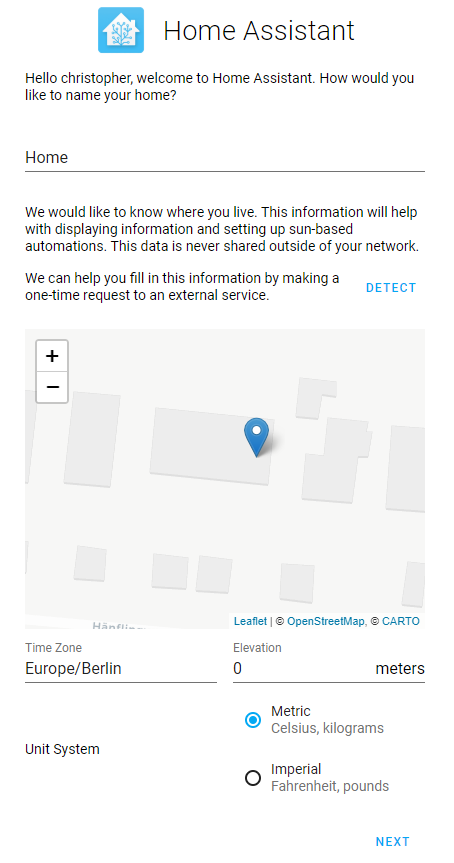
Now we can open Home Assistant in the browser on port 8123 of the Raspberry Pi. In my case the Raspberry Pi has the IP 102 and I start Home Assistant in the browser by starting the URL: 192.168.0.102:8123. Now you see the signup form of Home Assistant where you can define your name, username and password.
To get location based information you have to select your housing location on the following map. With the use of your IP address your location is guessed when you click on the detect button. You can then redirect the map to your exact location. The timezone and the unit system are automatically set to your location but if you prefer other setting you can change them.
On the next and also last page of the Home Assistant setup you can choose different smart devices in your home. If you have for example smart plugs, smart light bulbs or a smart TV that is turned on, you should see them in the current setup page like my Samsung TV is automatically recognized by Home Assistant.

But you can also add smart devices manually by clicking on the more button and add the devices by their IP address in you local network.
Now you can finish the Home Assistant setup and you see the Home Assistant dashboard. If you are familiar with the HASS.io installation of Home Assistant you maybe miss something because the HASS.io installation as operating system for the Raspberry Pi comes with a Supervisor button on the left sidebar.
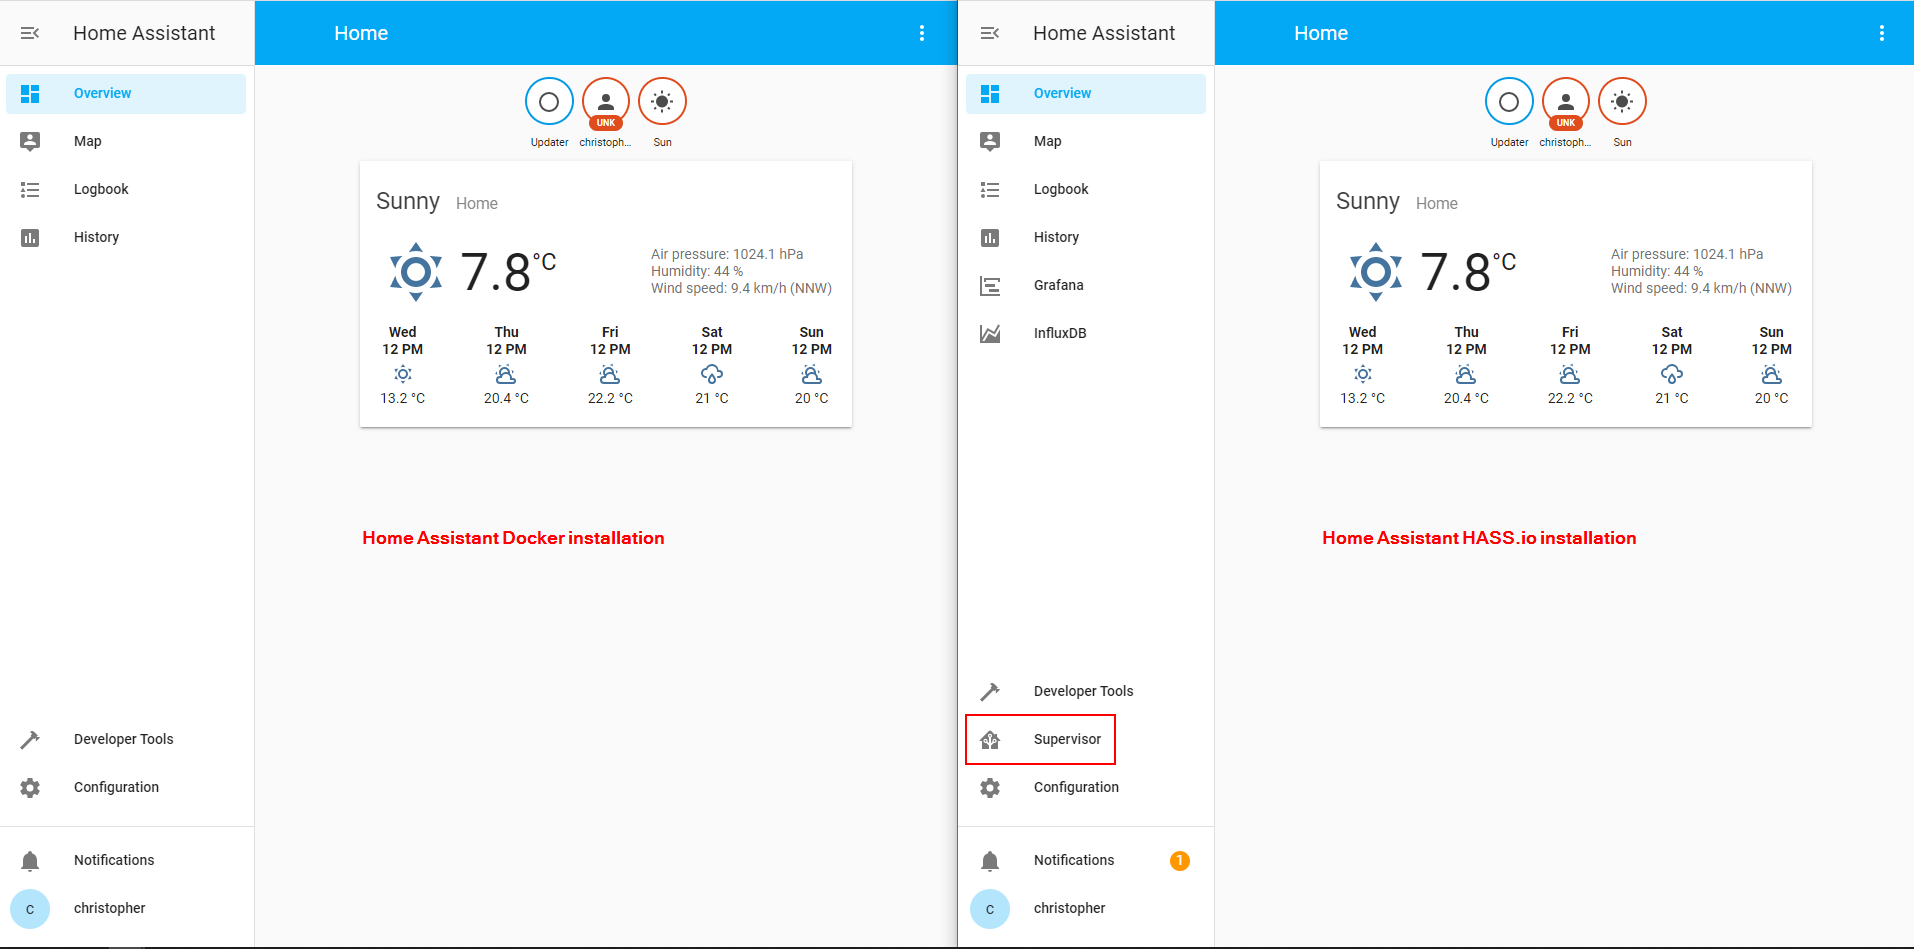
This allows you so make snapshots of the system to save configurations and to restart or shutdown Home Assistant. In our case because we run Home Assistant in a Docker container, we can save the configurations and reboot or shutdown Home Assistant via the Docker application.
One main advantage of the HASS.io installation is the integrated add-on store to install compatible applications. In our case also want to install Mosquitto MQTT boroker, InfluxDB and Grafana but we have to create a new docker container for each of this applications.
Install Mosquitto via Docker
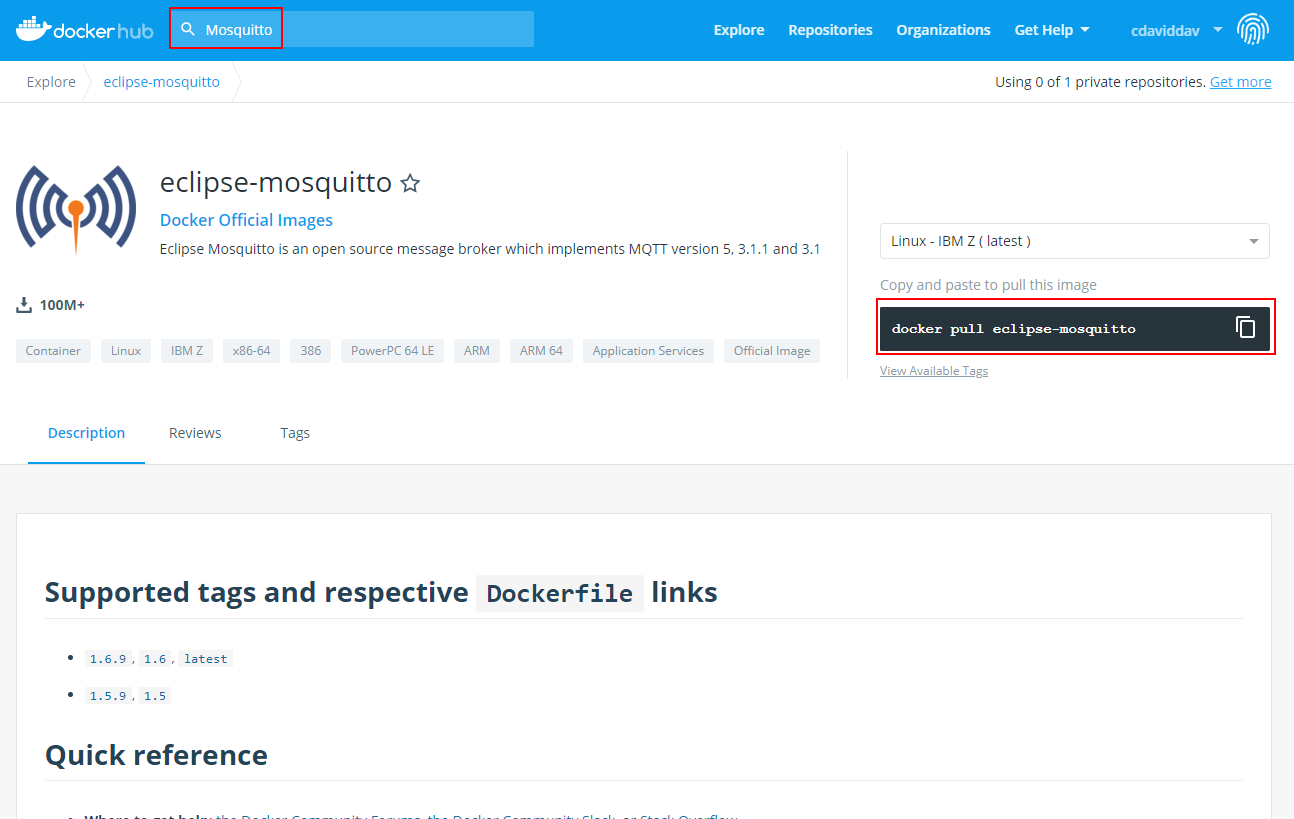
To receive MQTT data in Home Assistant we have to install an MQTT broker. In this tutorial I use the most frequently used MQTT broker Mosquitto. To find the Docker image of Mosquitto, we search for the application on the Docker Hub website.
On the right side we see that the image can be pulled via the command.
docker pull eclipse-mosquitto
Before we can start the container we want to share useful information between the host system and the Docker container. This is important because we want to define an individual configuration for Mosquitto that should be loaded at the creation of the Mosquitto container.
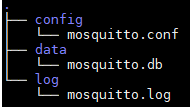
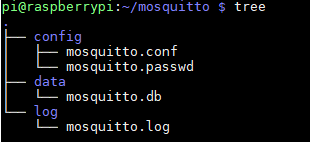
First we create the following folders under a mosquitto folder in your default directory: config, data and log.
In the config folder we create a file called mosquitto.conf with the following command.
nano config/mosquitto.conf
The configuration file has the following context.
pid_file /var/run/mosquitto.pid

persistence true
persistence_location /mosquitto/data/

log_dest file /mosquitto/log/mosquitto.log
log_dest stdout

password_file /mosquitto/config/mosquitto.passwd
allow_anonymous false 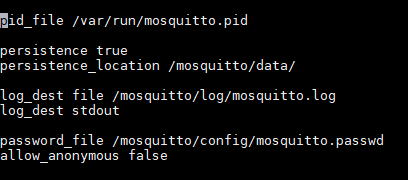
chown -R 1883:1883 ~/mosquittoNow we can create and start the Mosquitto container with the following command.
docker run -it -p 1883:1883 --name mosquitto -v ~/mosquitoconfig -v ~/mosquitto/data:/mosquitto/data -v ~/mosquitto/log:/mosquitto/log eclipse-mosquitto
- -it: create an interactive bash shell in the container.
- -p: define the published ports to the container. We match port 1883 of the host to port 1883 of the container.
- --name: gives the container a custom name to stop and restart the container by his name.
- -v: bind mount volumes between the host system and the container. The left side of the “:” defines the path of the host system and the right side the path in the container.
- -d (not used): Run the container in the background so that the console is free.
- Lookup the container ID in my case 5e2ec35d975b:
sudo docker container ls -a - Access the shell of the container:
docker exec -it 5e2ec35d975b sh
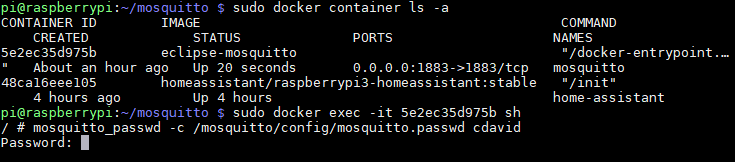
If we now look at the folder structure, there is a new data called mosquitto.passwd in the config folder that stores the username and password.
The password of this data is encrypted for security reasons, like you see in the following picture.

This was the hardest part of this tutorial and also costs me some time and also a lot of research and failures. After the MQTT broker is setup with an username and password, we continue our work by setting up a container for InfluxDB and Grafana.
InfluxDB Setup via Docker
docker pull influxdbNow we want also to share the volumes between the host and the container for InfluxDB. Therefore we create a new folder called influxdb. To start InfluxDB you only have to call:
docker run --name influxdb -p 8086:8086 -v influxdb:/var/lib/influxdb influxdb
Grafana Setup via Docker
docker pull grafana/grafanaTo start Grafana use the following command:
docker run -d --name=grafana -p 3000:3000 grafana/grafana
After the container is running, you can access the Grafana application on port 3000 with your browser, in my case: 192.168.0.102:3000.
At the end of this tutorial you should have to following Docker containers running. 
In this tutorial I want to focus on the setup of all Smart Home components like Home Assistant, Mosquitto, InfluxDB and Grafana as Docker containers. If you want to push data from the MQTT broker into InfluxDB and visualize the date in Grafana, then visit my InfluxDB and Grafana tutorial, were I show you step by step how to get the data funnel working. In this tutorial you will see that you also need a Python application that functions as an MQTT bridge. This MQTT bridge is a subscriber to all MQTT topics and pushes the data into the InfluxDB database.
If you have any questions regarding this tutorial or if you have problems setting up the Home Assistant environment, leave a comment in the following comment section and I will answer your questions as soon as possible.
Excellent write-up!!
Just a typo in the “Install Mosquitto via Docker” section.
In the line:
” docker run -it -p 1883:1883 –name mosquitto -v ~/mosquitconfig -v ~/mosquitto/data:/mosquitto/data -v ~/mosquitto/log:/mosquitto/log eclipse-mosquitto ”
“-v ~/mosquitconfig” should be “-v ~/mosquitto/config:/mosquitto/config”
Hi Michael, I corrected the typo. Thanks for the hint.
Thanks for the tutorial!
However when trying to run moquitto for the first time i got the following errors:
1593509404: mosquitto version 1.6.10 starting
1593509404: Config loaded from /mosquitto/config/mosquitto.conf.
1593509404: Error: Unable to open pwfile “/mosquitto/config/mosquitto.passwd”.
1593509404: Error opening password file “/mosquitto/config/mosquitto.passwd”.
What fixed it for me was not to include the last two lines of the mosquitto.conf file
“password_file /mosquitto/config/mosquitto.passwd
allow_anonymous false”
and adding them back in once the container was running, before entering the mosquitto container shell.
Hi Arthur,
I want to dive deeper into that possible problem. Do you give Mosquitto access to the folder via “chown -R 1883:1883 ~/mosquitto”? Do you start the Mosquitto container via docker run … or sudo docker run …?
Here’s how I fixed it:
Don’t uncomment the last two lines, but rather instead, before running the cmd create the mosquitto.passwd file in /mosquitto/config/mosquitto.passwd first, then run the command.
Hi Kevin, thanks for your response. If there are more problems to this topic, I will do the setup for myself again and change the sequence.
I keep getting errors when I try to run
sudo chown -R 1883:1883 ~/mosquitto
it’s saying that:
chown: cannot access ‘/home/pi/mosquitto’: No such file or directory
Any suggestions on why this is?
Yes first you have to create a folder named mosquitto in your home folder that is under /home/pi/
Under this folder you create three folders config, data and log that you can see in https://diyi0t.com/wp-content/uploads/2020/04/Mosquitto-tree.png
Hi! Excellent article!
I would like to know if it is possible installing any version of Home Assistant that allows us to make snapshots and adding add-on?
Thank you!
See here: https://community.home-assistant.io/t/how-do-i-back-everything-up-solved/25643
Thank you, though…
“docker run -it -p 1883:1883 – name mosquitto -v ~/mosquitto/config:/mosquitto/config -v ~/mosquitto/data:/mosquitto/data -v ~/mosquitto/log:/mosquitto/log eclipse-mosquitto” gives me an error
“docker: invalid reference format.” No matter what I try…
This worked for me, it basically just maps the local rpi’s network to the docker container, so you don’t have to open just a specific port:
sudo docker run –name mqtt –net=host -ti -v ~/mosquitto/config/:/mosquitto/config/ -v ~/mosquitto/log/:/mosquitto/log/ -v ~/mosquitto/data/:/mosquitto/data/ eclipse-mosquitto
then in another terminal get the container id like this:
sudo docker container ls -a
then do:
sudo docker exec -it sh
without the brackets of course
Hi and thanks for the article.
But I got errors to in the docker run command “invalid reference format”. Realized after a while that it was because I used copy and paste from this site. The double minus sign used before “name” in the run comand has been formated as one longer minus sign. I also had to use sudo before command.
Same here, I had to use `sudo docker run –init -d –name=”home-assistant” -e “TZ=Europe/Paris” -v /home/pi/homeassistant:/config –net=host homeassistant/raspberrypi3-homeassistant:stable`
Hi,
this is a feature in WordPress that comes with the last release, but I found a workaround and changes the article. Now everything should be good.