HASS.io Raspberry Pi Setup Tutorial
In this article I show you the easiest and fasted way to install HASS.io as well as all additional programs on a Raspberry Pi that you need for your smart home.
The programs we need are the following:
- Home Assistant via HASS.io as overall smart home dashboard to control your smart devices.
- Mosquitto as MQTT broker to receive data from self build sensors in your home.
- InfluxDB as database to store MQTT data.
- Grafana to create time series dashboards based on data in the InfluxDB database.

Table of Contents
This article belongs to a series of 5 articles about the setup and use of Home Assistant. The following picture shows how the articles are related to each other
The following table gives you an overview of all components and parts that I used for this tutorial. I get commissions for purchases made through links in this table.
HASS.io installation on the Raspberry Pi
The installation of Home Assistant via the HASS.io image has several advantages but also disadvantages compared to the installation based on Docker. The following table shows these advantages and disadvantages.
The installation of HASS.io is nothing else then installation of Raspbian on your Raspberry Pi. On the Home Assistant website you find the last stable version for your device.
In my case I want to install the operating system on my Raspberry Pi 3 Model B and choose the recommended 32 bit version. If you have a Raspberry Pi Model 4, then you have of course to install the HASS.io version for the Model 4.
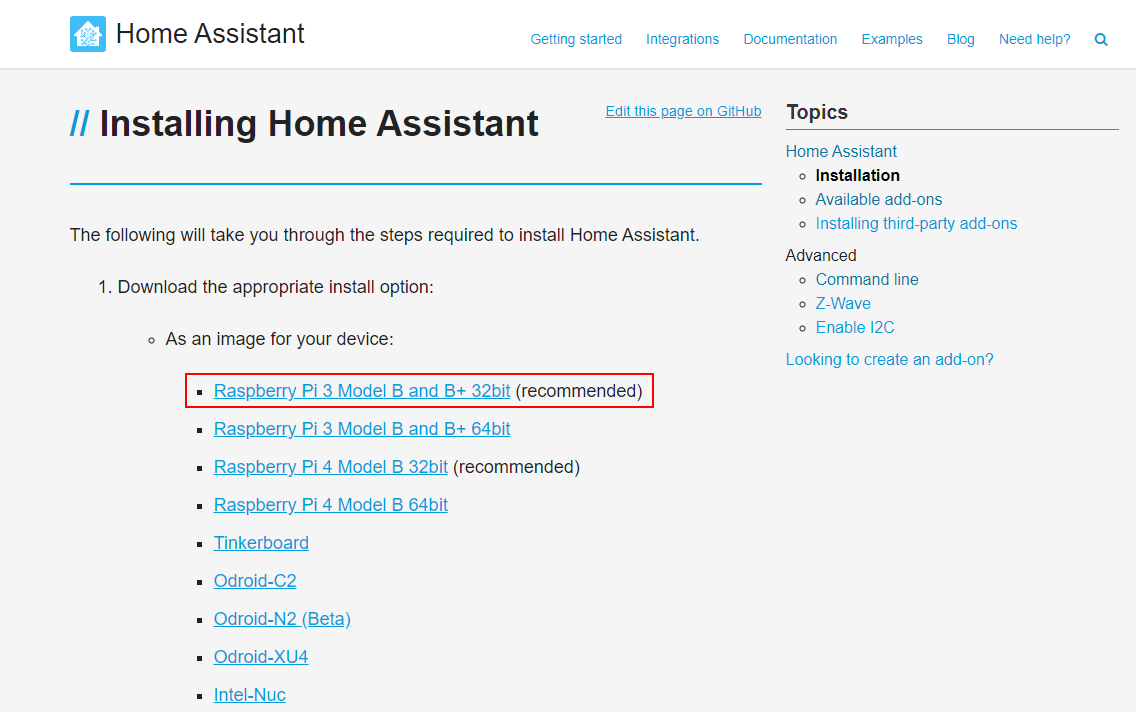
The download of the HASS.io image starts immediately after clicking on the device. After the download is complete we have to install HASS.io on the SD card. There are several software programs to do this task but Etcher is most used. Etcher is a free and open-source software to write images like .iso or .img file to storage media like USB sticks or SD cards. Download and install Etcher from the official website.
After the installation open Etcher. You should see the following screen.
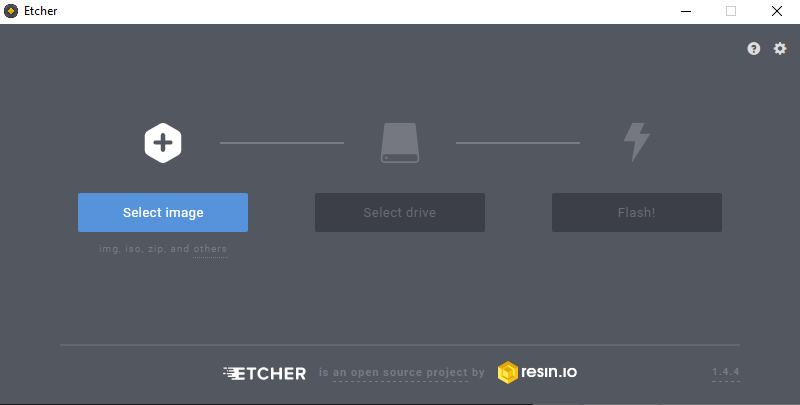
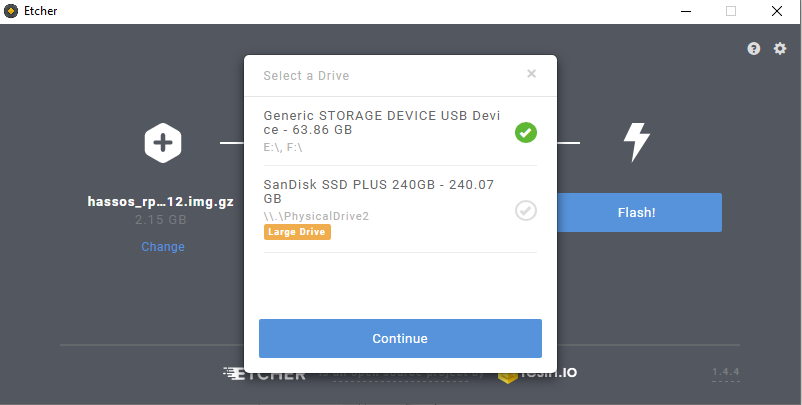
The first step is to select the image. Click “Select image” and select the .img.gz image that you downloaded before. Then you have to select the micro SD card by clicking “select drive”. It is recommended by the developer of Home Assistant to use a SD card with lat least 32 GB to not running out of space.
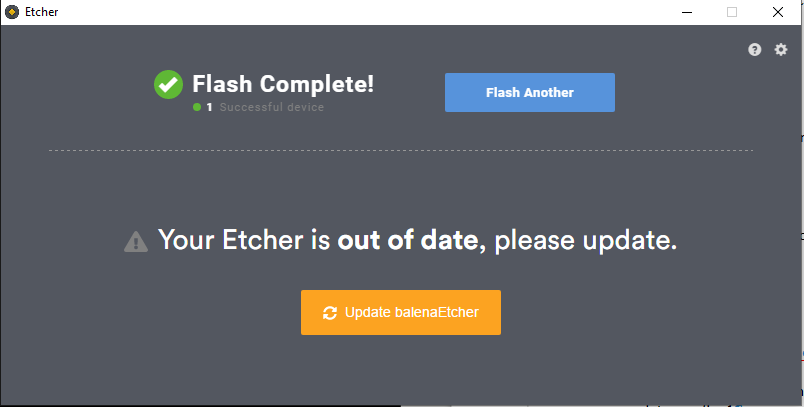
The last step is to click on the “Flash!” button and start the flashing process of the image to the micro SD card. After the flash process is complete you get a confirmation that everything went well
Now you insert the micro SD card into your Raspberry Pi and connect the Pi via LAN to your network. It can take up to 20 minutes for HASS.io to be accessible, because the OS is looking for updates and install these updates directly.
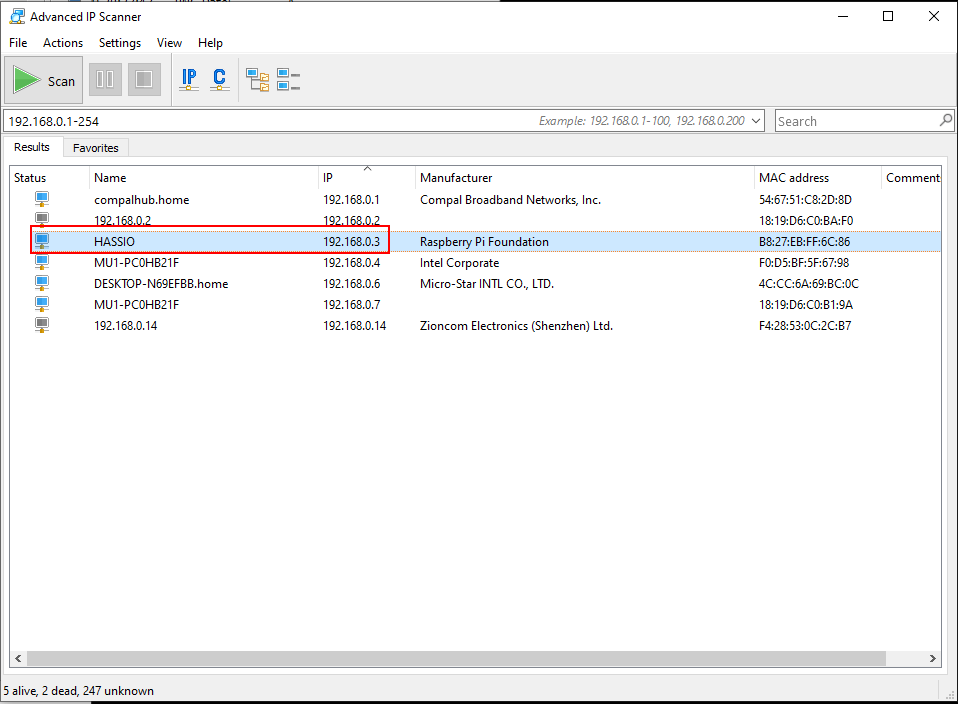
To access HASS.io we have to know the IP address of the Pi. Therefore we need an IP scanner software like Advanced IP Scanner which is a free, fast and powerful network scanner with a user-friendly interface. You can download the Advanced IP Scanner from the official website. After installing and starting the software you can scan your local network for active IP addresses. The alternative is to log in to your modem and look for connected devices. In my case the IP address is: 192.168.0.3.
Initial Setup of HASS.io
Now you can log into HASS.io on port 8123. This is done by typing in the IP address followed by a double dot and the port number on your browser. In my case I connect to HASS.io with: 192.168.0.3:8123.
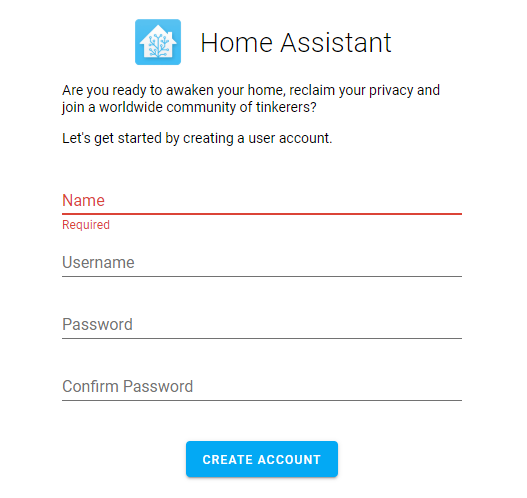
You should see the signup form where we have to create a user with a name, an username and a password. Choose a name, username and password and click “create account” to get to the next window.
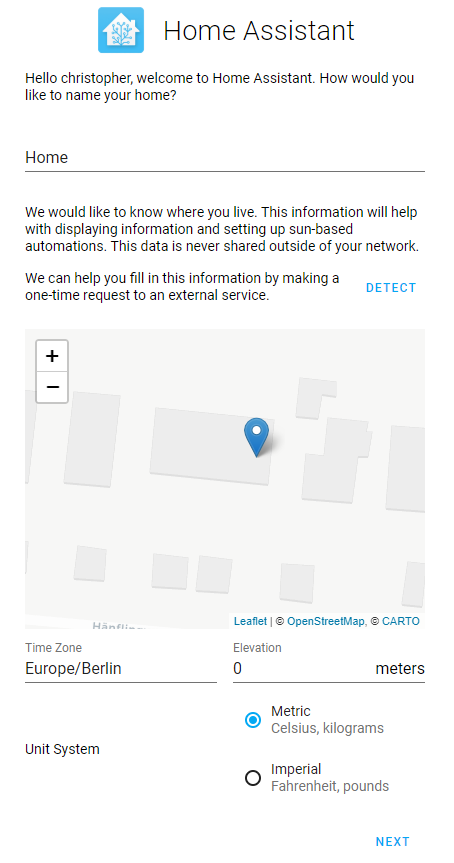
In the next window we define our location, to get automatically location based information on your Home Assistant dashboard like:
- Time of the sunset and sunrise to create automation processes based on the GPS information, for example turn on a specific light after sunset.
- Weather forecast information.
With the detect button, your location is searched based on your IP information. But you have to redirect the arrow on the map by moving the map and clicking on your home. Your time zone and the unit system is then set based on your location. If you want to change these settings you can do these also later in the settings of Home Assistant. Click the next button on the bottom of the website to go to the next and last page of the HASS.io setup.
If you have smart devices in your local network, they should be automatically detected by the operating system. In my case I have a Samsung smart TV that is detected. The identification of smart devices in the network is very good and all devices should be found. But if you have devices that are for example self build with the ESP8266 microcontroller, you can add them with the “more” button and the ESPHome integration.
Also other devices that are not found automatically can be added with the IP address of the device. Now click “finish” to get to the HASS.io dashboard.

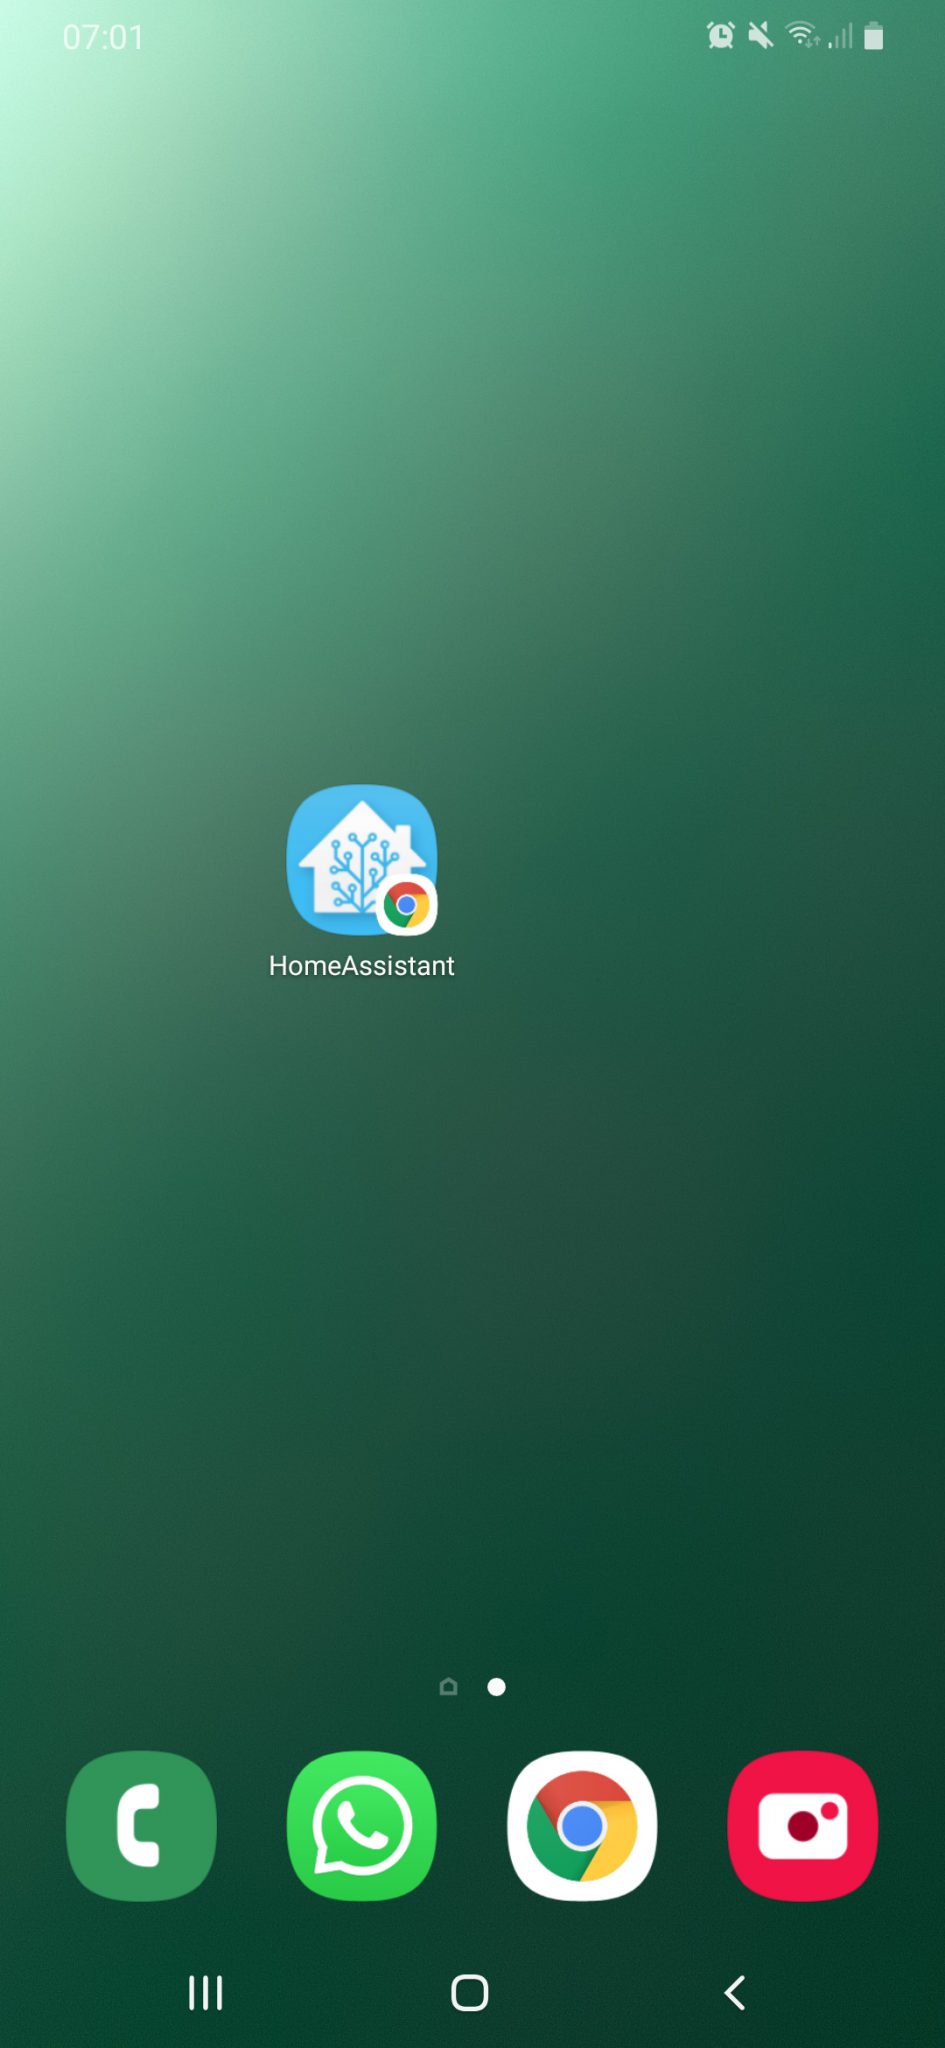
You can also visit Home Assistant with your smartphone by visiting the same URL like in your browser. Most smartphones also have the function to add a browser URL to the start screen (like an app) to visit Home Assistant with one click.
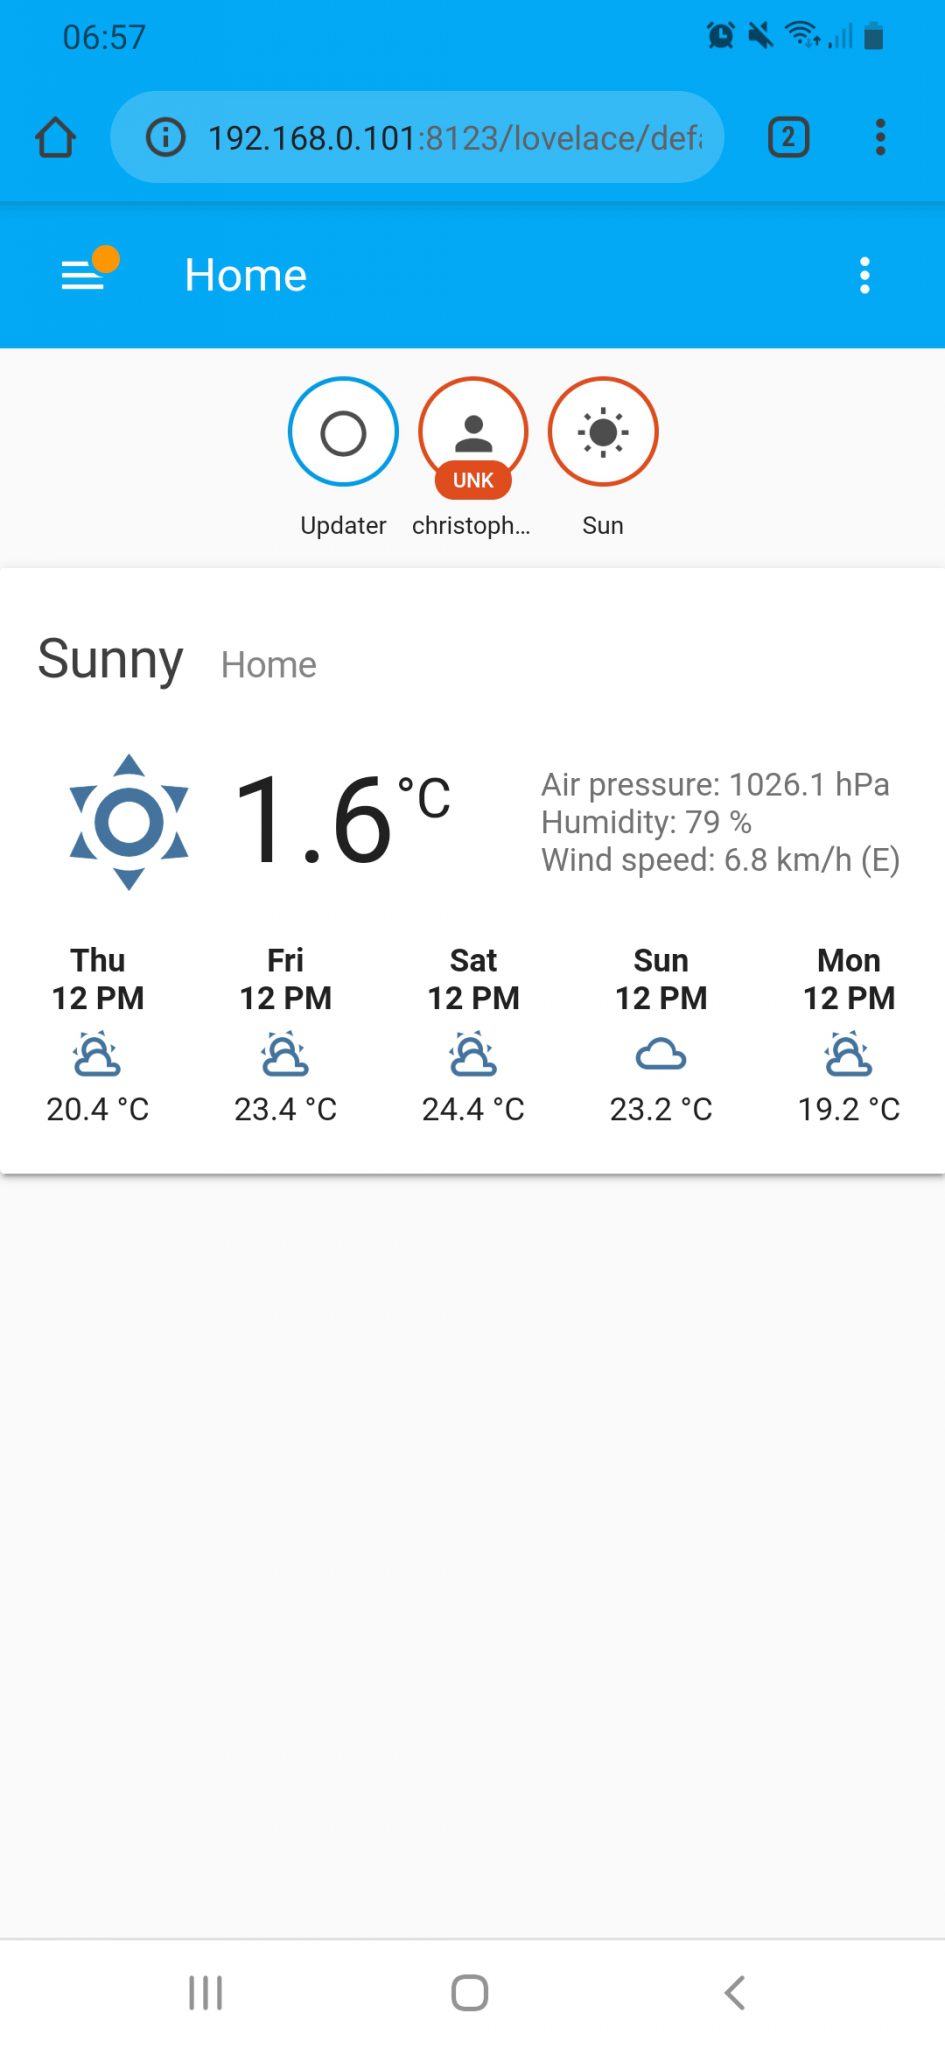
Now you see the Home Assistant dashboard and the initial setup of HASS.io is complete. If you are interested in the general functionalities of Home Assistant then you can visit the Home Assistant tutorial article.
In this article we will now focus on the following topics:
- Configuration of a static IP address for Home Assistant
- Setup of Mosquitto as MQTT broker
- Setup of InfluxDB and Grafana to visualize MQTT data
Configuration of a Static IP Address
Now you could run HASS.io on your Raspberry Pi but you do not have any control over the used IP address of the Raspberry Pi. This is bad because we want to send data from self build weather stations via the MQTT transportation protocol to the Raspberry Pi. If the Raspberry Pi reboots after a problem or an electricity cut, the router gives the Raspberry Pi a new IP address and the weather stations will send the data to an MQTT server that does not exist anymore with the pre-configured IP address. In this case you have to connect every weather station to your PC and change the IP address in the Arduino code.
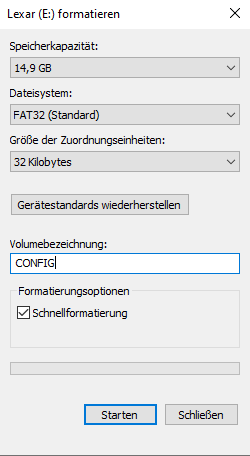
Therefore we set the IP address for HASS.io to static by creating a configuration USB stick that is connected to the Raspberry Pi. The USB stick has to be formatted as FAT32 and called CONFIG, as you see in the following picture.
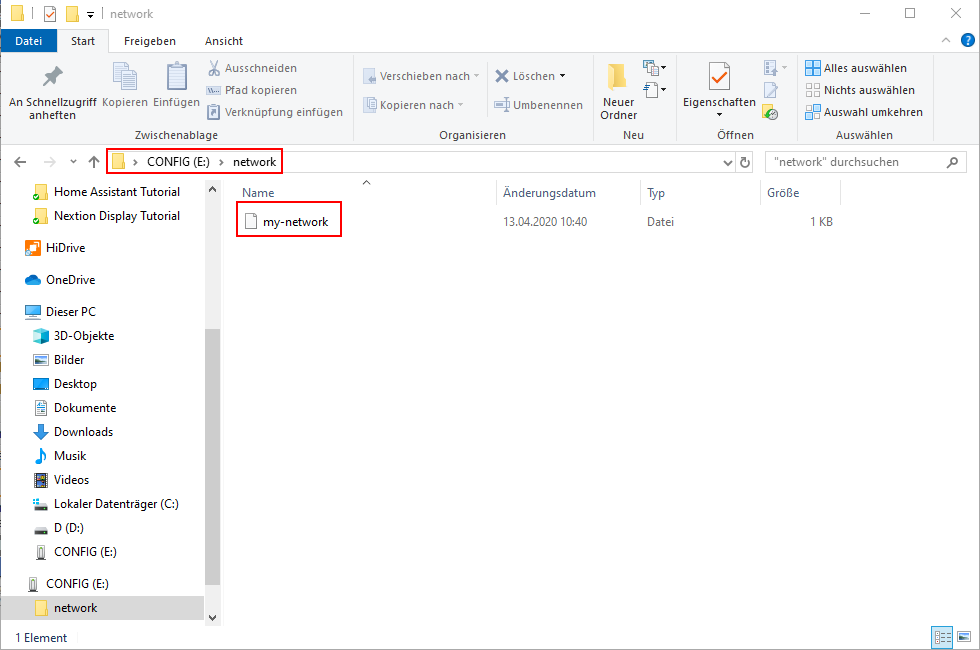
On this USB stick you create a folder called “network” and create a file called “my-network” by creating a text file and delete the “.txt” ending.
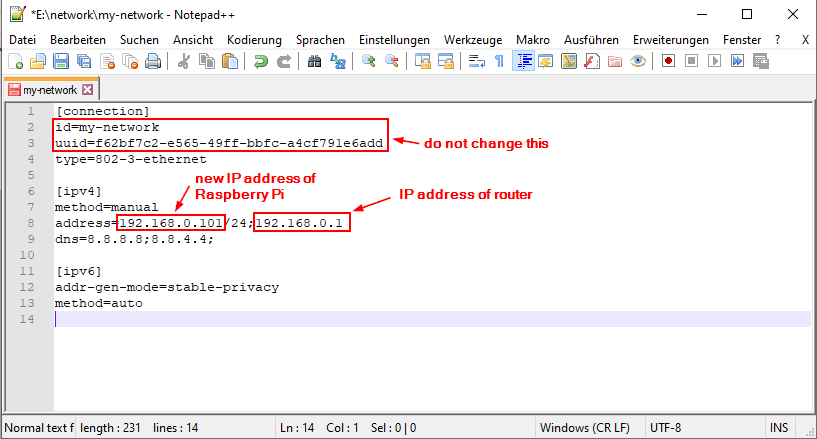
[connection]
id=my-network
uuid=f62bf7c2-e565-49ff-bbfc-a4cf791e6add
type=802-3-ethernet

[ipv4]
method=manual
address=192.168.0.101/24;192.168.0.1
dns=8.8.8.8;8.8.4.4;

[ipv6]
addr-gen-mode=stable-privacy
method=auto
The id and uuid in the connection section do not have to be changed and are defined by Home Assistant. In the ipv4 section you have to change the address to your preferred IP of the Raspberry Pi and the IP address of your router.
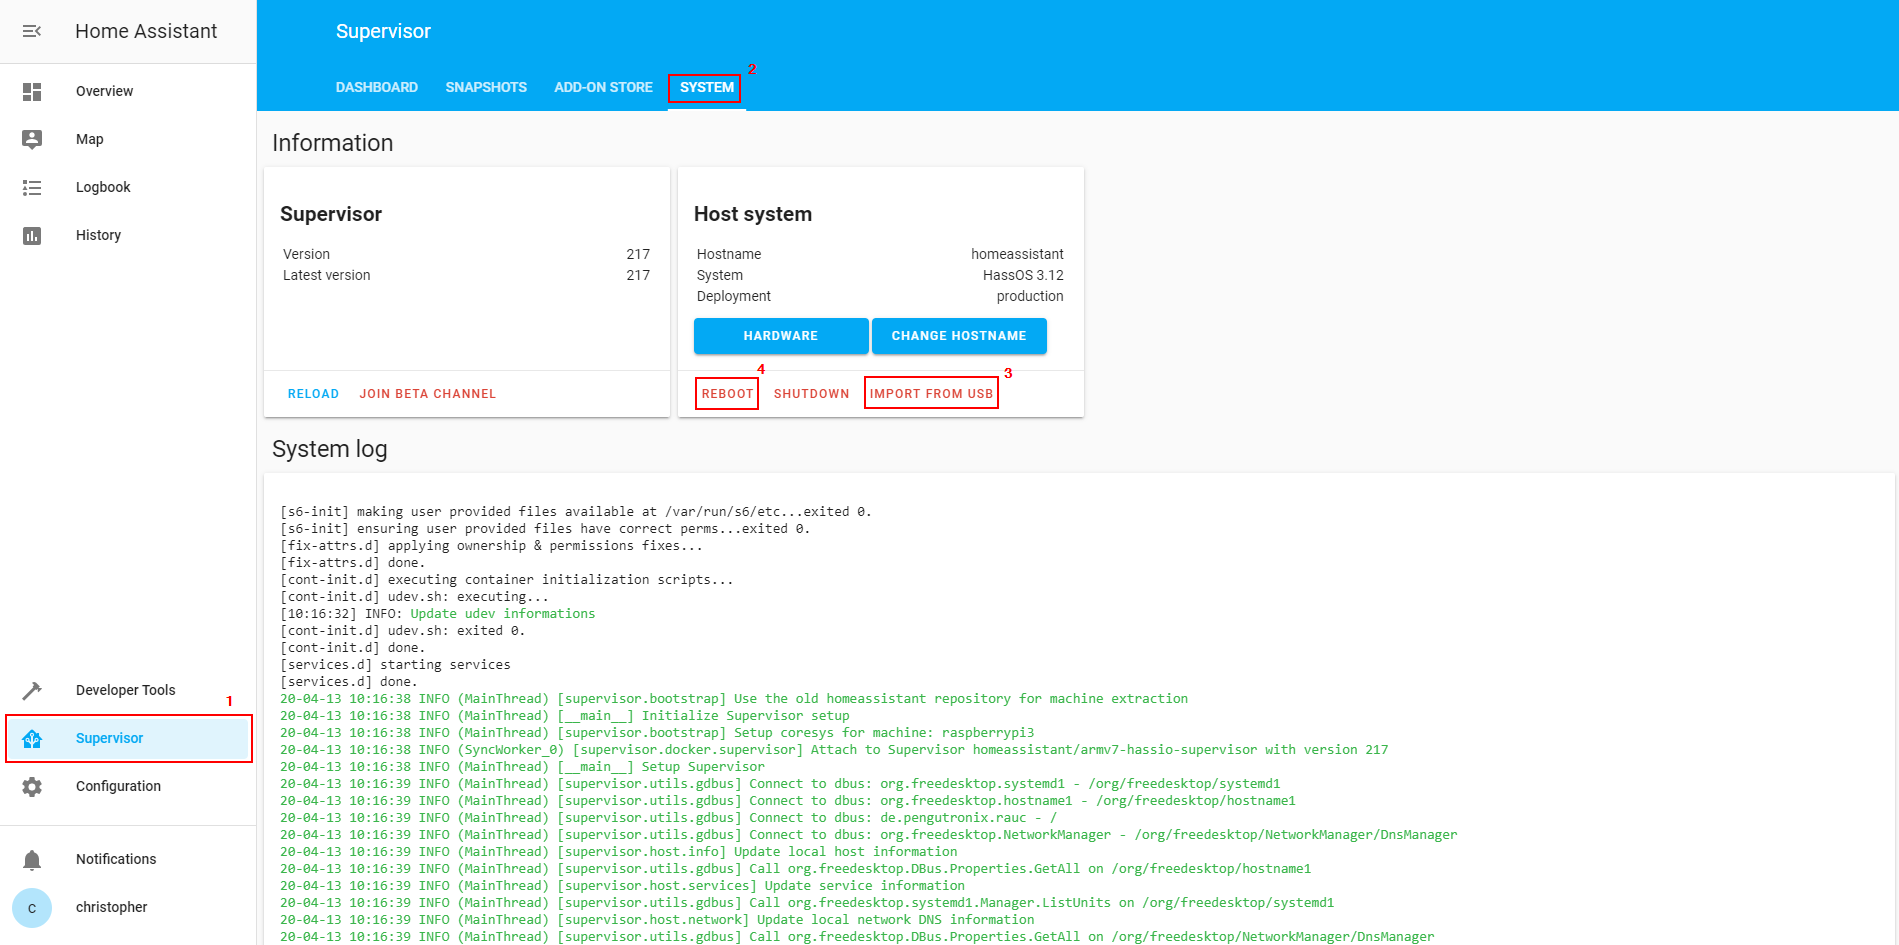
Now you can save the file and insert the USB stick into one of the USB ports on the Raspberry Pi. In the Home Assistant dashboard you can import the network settings by clicking the button under Supervisor → System → Import from USB. The last step is to reboot the system by clicking on the reboot button next to the import button.
The Raspberry Pi reboots on the new IP address. Therefore you have to close the current window on your browser and open a new one with the new IP address followed by the port 8123. In my case the new address is: 192.168.0.101:8123.
After you see the Home Assistant dashboard again you can remove the USB stick from the Raspberry Pi.
Setup of Mosquitto as MQTT broker
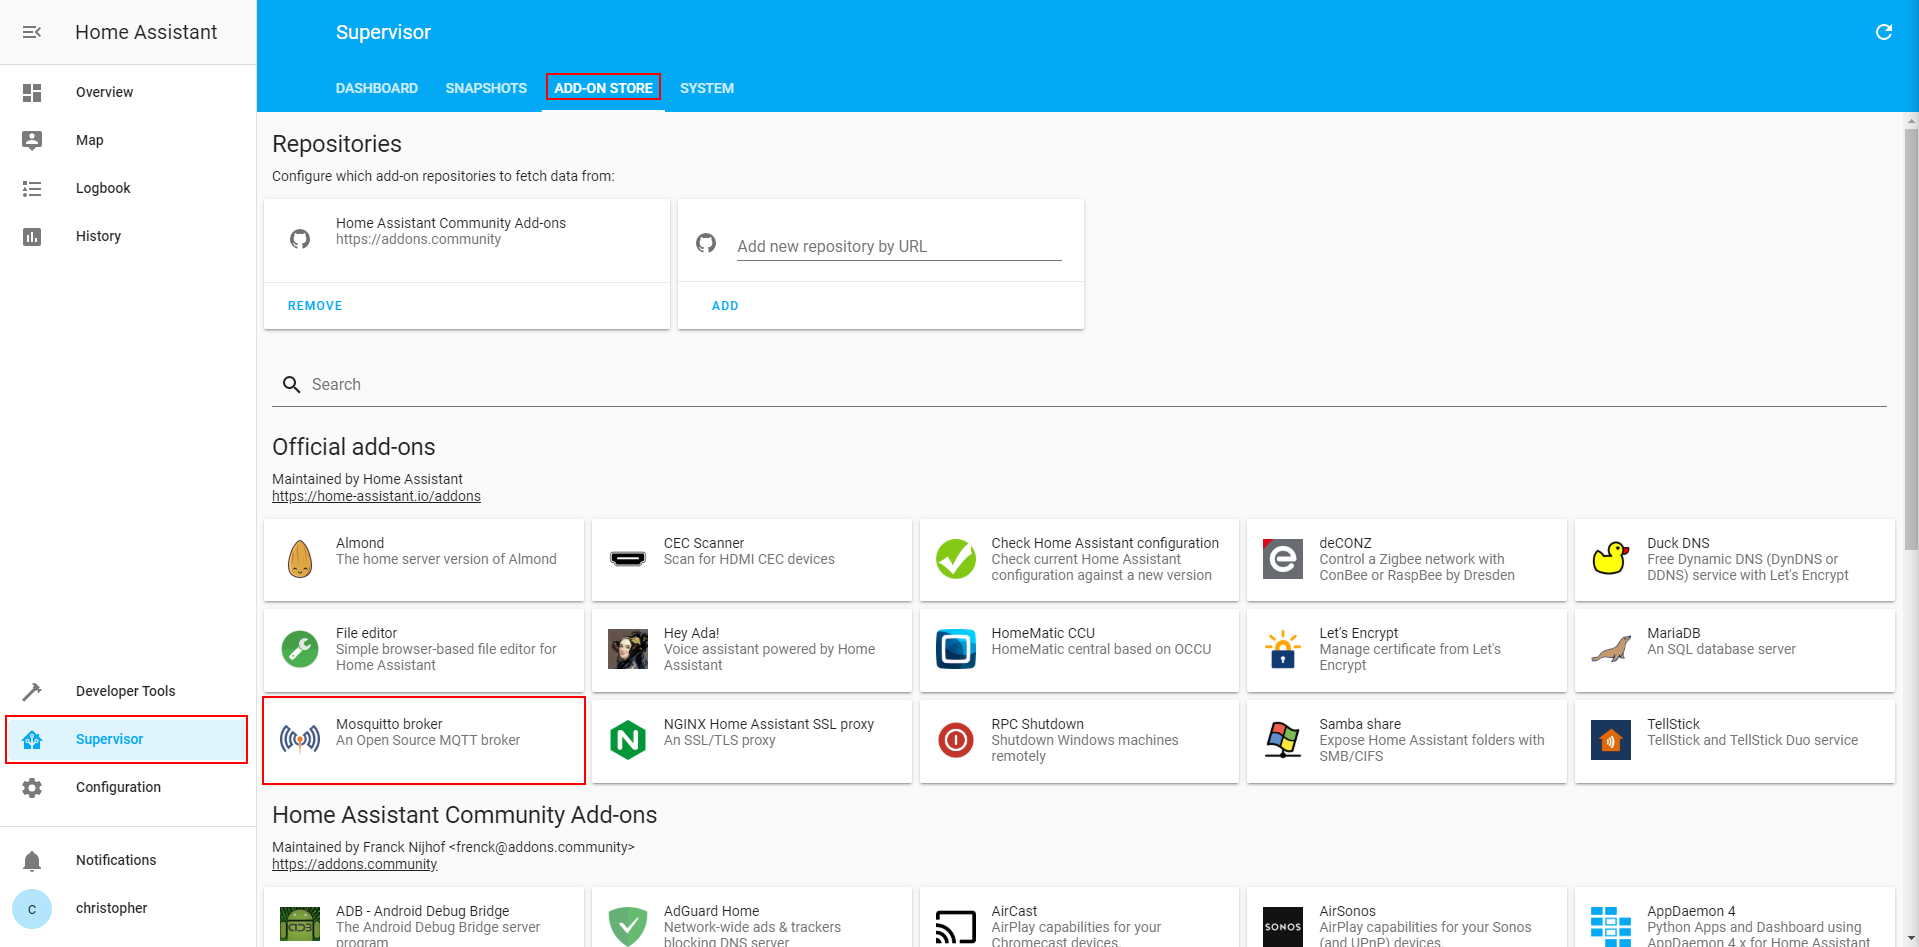
The following setup of the Mosquitto MQTT broker is very easy for the HASS.io installation, because with this operating system, an Add-on store is included. You find this add-on store under the supervisor section of Home Assistant. You find the Mosquitto broker in the official add-ons section.
This supervisor section is not included if Home Assistant is installed via docker.
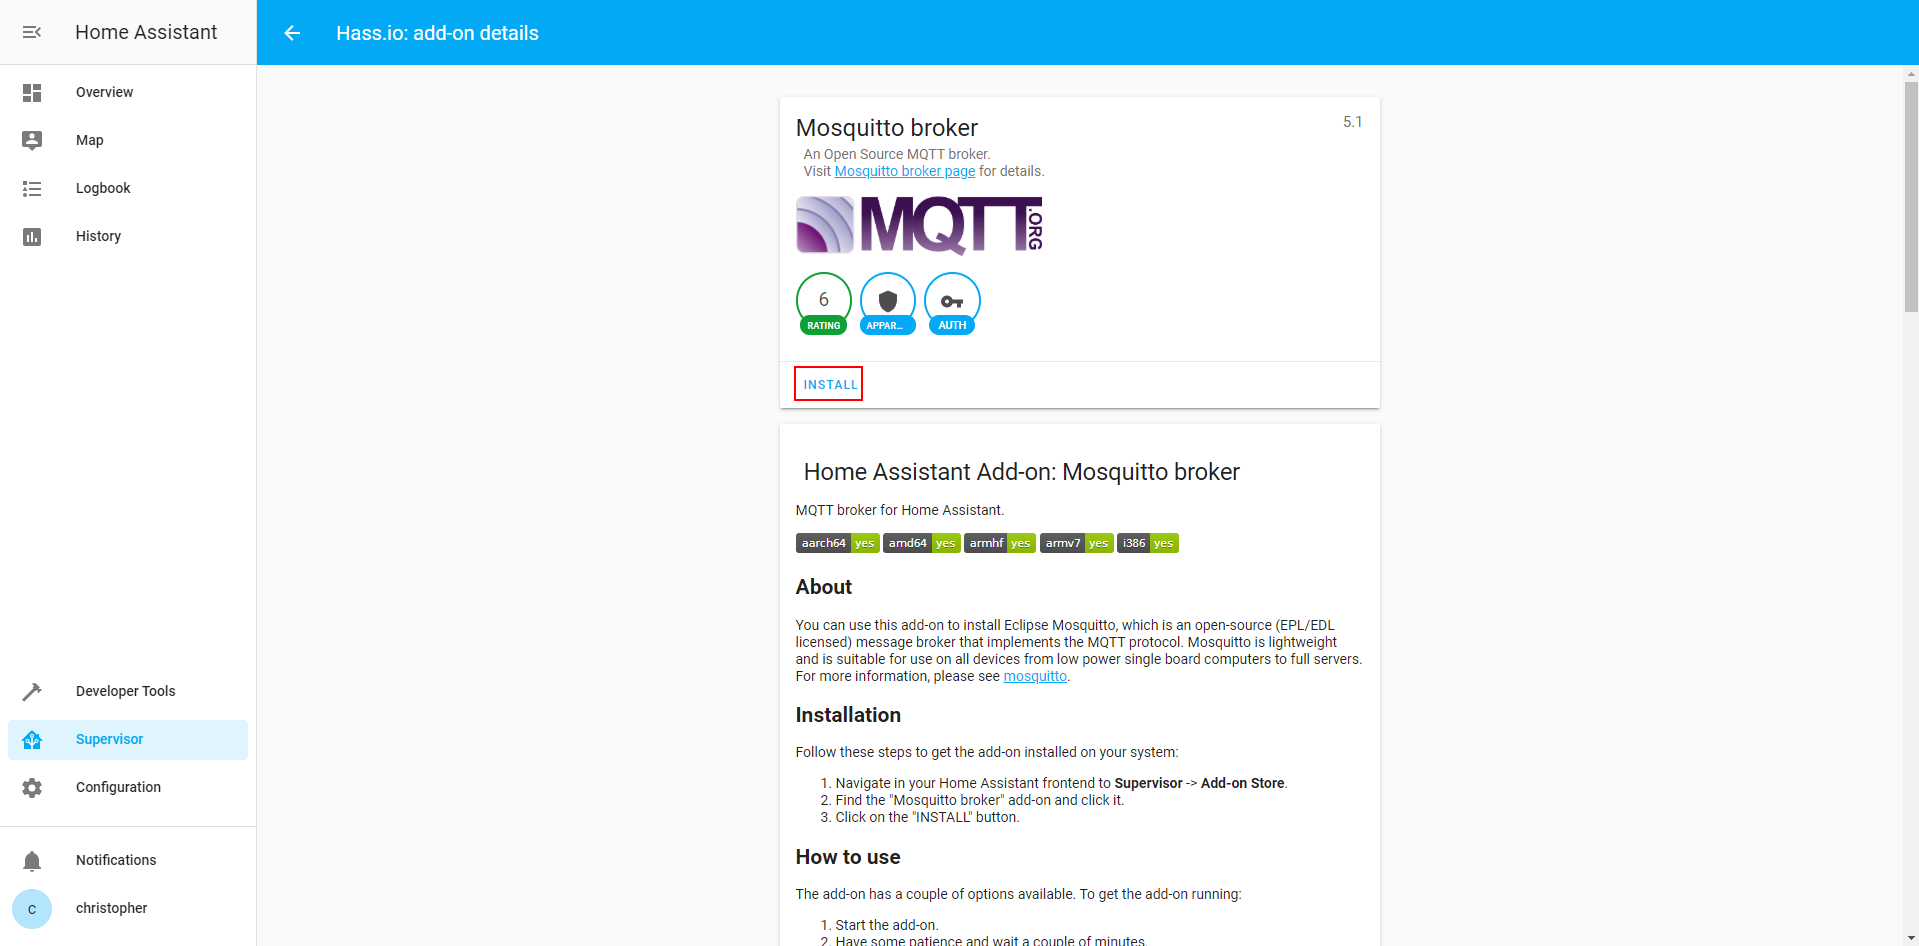
Click on the Mosquitto broker button and on the next page you install the MQTT broker via the install button.
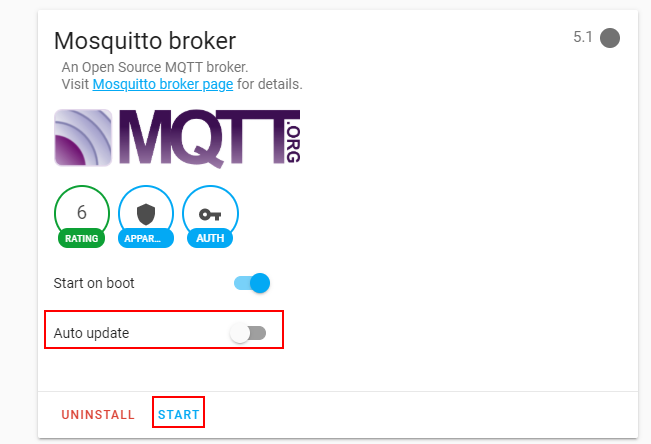
After a few seconds the installation of the Mosquitto broker is finished and you can turn on the auto updater if you want and start the broker with the start button.
The next step is to configure the MQTT broker because we want only defined users with an username and a password that can send and receive data. On the add-on site of the Mosquitto broker scroll to the bottom to see the configuration file. Here we add an username and a password of your choise, like you see in the following picture. If you want to use the username and password that you selected in the signup form during the installation of HASS.io, then you do not change the default configuration.

After Mosquitto is installed and configured, the last part is to integrate the MQTT broker into Home Assistant. Go to the Integrations page (Configuration → Integrations) and you see that MQTT was discovered.
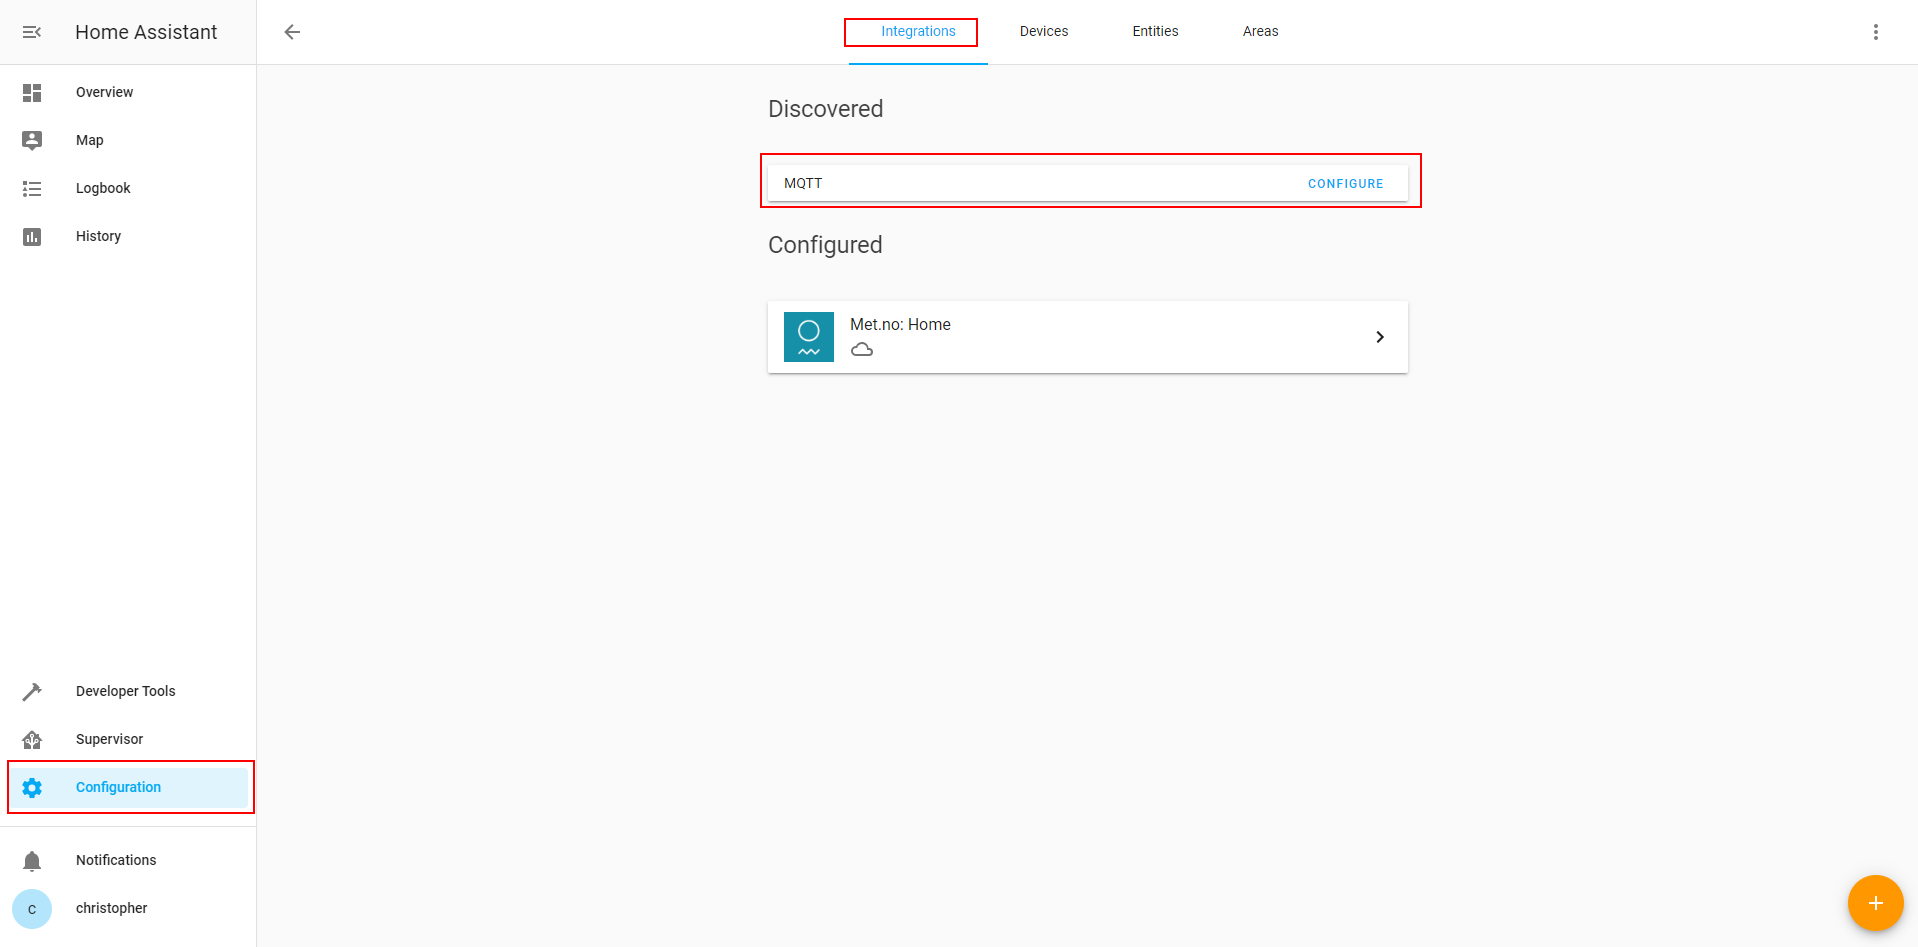
Click on the configure button, select the enable discovery option and submit the selection. Now the Mosquitto MQTT broker is ready to use.
Setup of InfluxDB and Grafana to visualize MQTT data
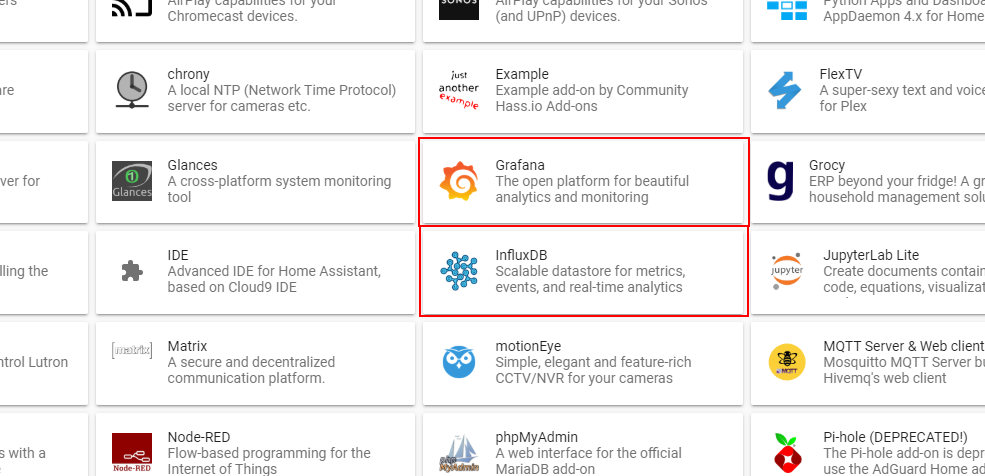
After we can receive MQTT data with the Mosquitto MQTT broker, we wan to store the data into an InfluxDB database and create visualizations in Grafana like we did in the InfluxDB and Grafana tutorial. Therefore we also have to integrate the two addons for Home Assistant.
Like Mosquitto you find InfluxDB as well as Grafana in the addon store.
The installation is similar to the Mosquitto installation. During the installation of InfluxDB and Grafana you can choose to show InfluxDB on the sidebar, which I recommend to get easy and fast access to the database.
Well done, you have finished the Home Assistant setup via HASS.io on your Raspberry Pi. Now you can add all of your smart devices and take your time to play with Home Assistant.
If you want to know how to show MQTT data from a self build weather station in Home Assistant and also in Grafana, then I recommend to read the Home Assistant tutorial.
If you have any questions regarding this tutorial or if you have problems setting up the Home Assistant environment, leave a comment in the following comment section and I will answer your questions as soon as possible.
Leave A Comment